

Setting up Floating License and License server on Mac
 Floating license enables users to share the Visual Paradigm concurrently based on the limit of concurrent access specified on the floating license. In order to access the floating license, you need to install the VP Server and enable its Floating License Server Module in your Local Area Network in advance. This article will demonstrate how to download, install and configure VP Server and enable the Floating License Server module on Mac environment.
- Downloading Floating License key
- Downloading VP Server
- Installing VP Server and Floating License Module
- Installing VP Server As System Service
- Configuring Visual Paradigm to Use Floating License
Downloading Floating License key
- Login to the Visual Paradigm Customer Service Center (https://cs.visual-paradigm.com/).
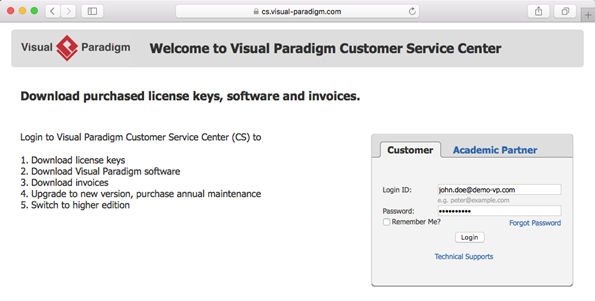
Login to Customer Service Center account
- Under Licenses tab, select the floating license and press Download button to save the license key to your hard drive.
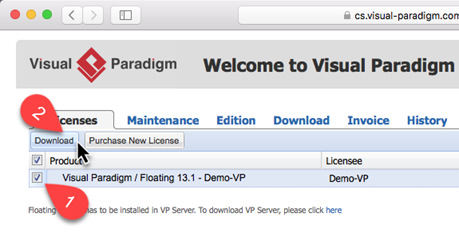
Download floating license key
Downloading VP Server
- In Visual Paradigm Customer Service Center, click the Download tab.
- Click Latest Version tab.

Open Latest Version tab
- Select the platform you (your team) are using from the combo box and press Download button to download VP Server.
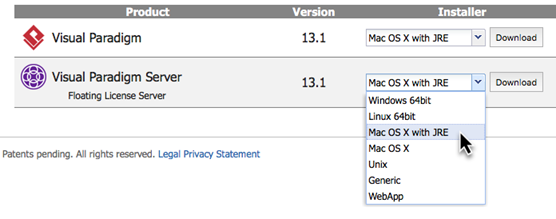
Download VP Server
Installing VP Server and Floating License Module
- Double click on the downloaded downloaded VP Server to unpack it.
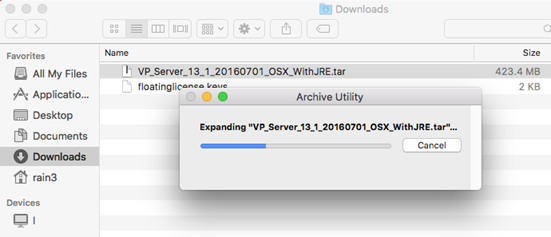
Unpack the downloaded VP Server
- Move the unpacked VP Server to Applications folder.
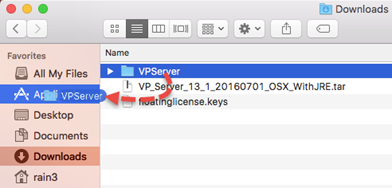
Move the unpacked VP Server to Applications folder
- Open the Terminal on Mac.
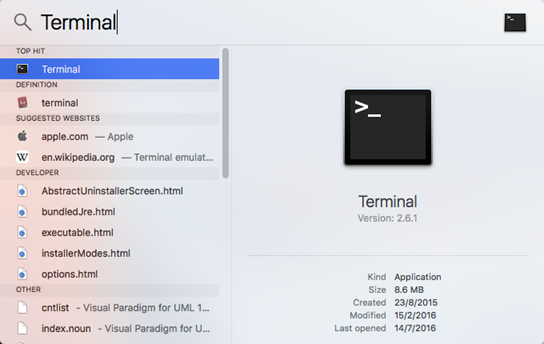
Open Terminal
- Navigate to scripts folder of VP Server in Terminal using CD command (cd /Applications/VPServer/scripts/).
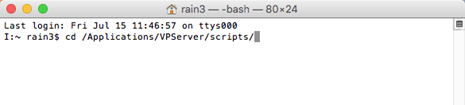
Navigate to scripts folder of VP Server
- Launch VP Server by execute the startup script (./startup.sh).

Launch VP Server by execute startup.sh
Once you see the message Server startup in xxxx ms which means your VP Server is started. Do NOT close it or else the server will be terminated.
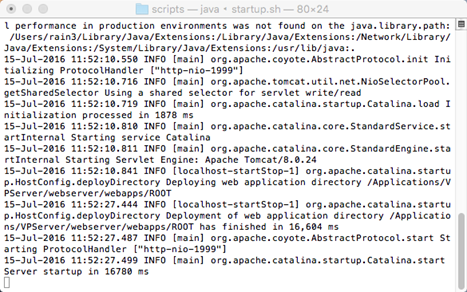
VP Server being started
- Open your web browser and visit to VP Server with port 1999 (i.e. http://%IP or host name of server%:1999/). If you are opening the browser on the machine hosting VP Server then you can enter http://127.0.0.1:1999 to access the server.

Open browser and access to VP Server
- In the VP Server Installation page, enter the Organization Name followed by the Administrator Password. And then click the Select Module button to proceed.
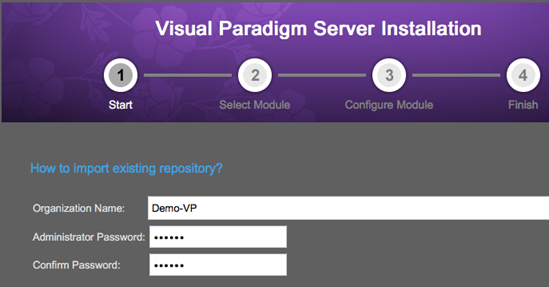
Specify company name and Admin password
- Select the Floating License Module, and then Click the Configure Database/Module button.

Select floating license module
- You can specify your own database for storing your setting information of your VP Server. Or if you don’t have a database for this, you can use our embedded database to store those information. Let’s specify the Embedded DB and click Configure Module button to proceed.
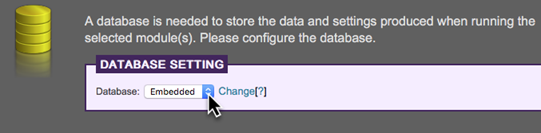
Specify database for license server
- Now in the Configure Floating License Module section, import the floatinglicense.keys you downloaded previously by clicking the Choose File button and locate it with the file chooser.

Import floating license key
- You can optionally fill in the Administrator Email so that VP Server can send out notification email when the number of license request exceeds the number of available licenses on server.

Enter administrator email address
- Click Finish button to complete the installation. Click the Go to Login Page once the installation process completes.
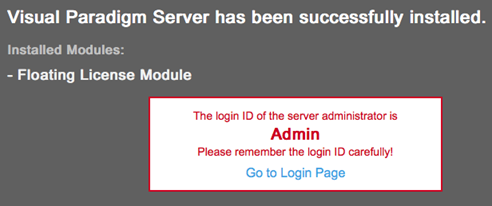
Installation complete
- Login to VP Server as administrator with user name Admin.
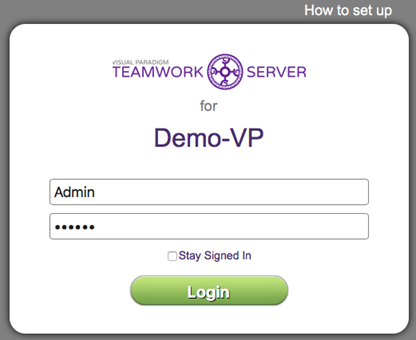
Login to server as administrator
- Click the Mail Server button at the bottom of the page to configure the mail server for your VP Server.
Configure mail server for VP Server
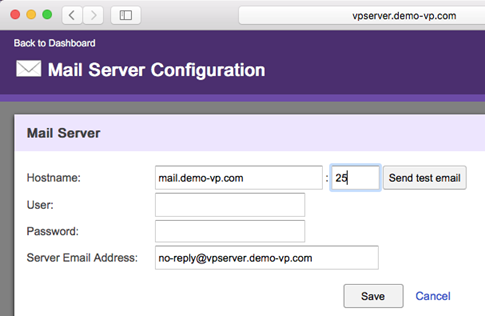
- Specify the Hostname, port, as well as the Server Email Address. If your network need authorization for sending out email then please also specify the User name as well as the Password. Press Save button to store the setting.
Specify mail server details
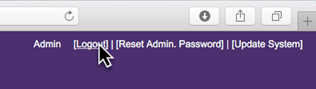
- Click the Logout button at the top right hand corner of the server to logout the admin session.
Logout the server
Installing VP Server As System Service
You can install VP Server as a system service by simply execute the install_service script inside the scripts folder under VP Server installation directory. The VP Server will result in automatically starting up when you start your system. Note that you may need to have administrator permission in order to setup the system service.
Configuring Visual Paradigm to Use Floating License
After enabled the floating license module, you need to configure the VP clients to enable access to the floating license from the server.
- When you start up Visual Paradigm, the License Key Manager dialog box will be prompted to ask you to import license. Select Perpetual License.
Select Perpetual License
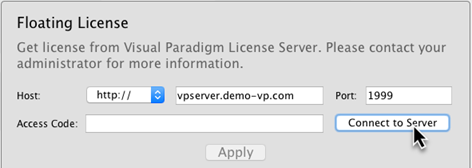
- Select Floating License, and specify Connection type (http or https), Host and Port of the VP Server. Default port number is 1999. After that press the Connect to Server button to proceed.
Specify the host and port of your VP Server
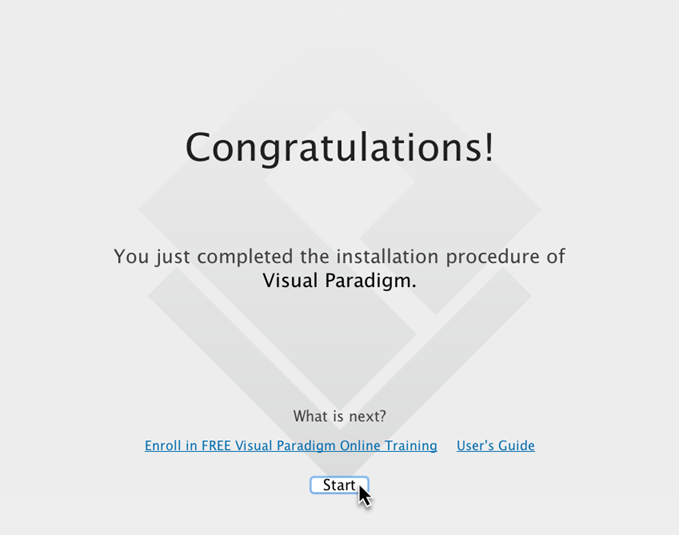
- If there are more then one edition of floating license on your server you can pick the edition launching Visual Paradigm. Click Apply button to complete the configuration, and then press the Start button to proceed.
Finish configuration
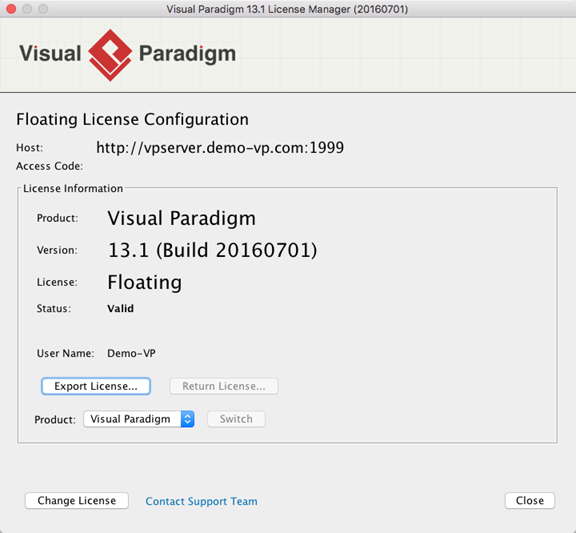
- You can open the License Manager will see what license you have. For Sleek UI user you can open it by go to Window > License Manager.
License Key Manager with floating license
Leave a Reply
Want to join the discussion?Feel free to contribute!