

Importing models through Excel file
 It’s always a nightmare when you need to transform your models from one format into another one, especially when you need to migrate to a new paradigm, i.e. convert your textual and tabular form data into a graphical presentation. Instead of re-creating all your model elements, you can transform your data into an Excel file, and import it to Visual Paradigm and visualize it as a diagram. To do this:
Open Visual Paradigm and create a brand new project file.
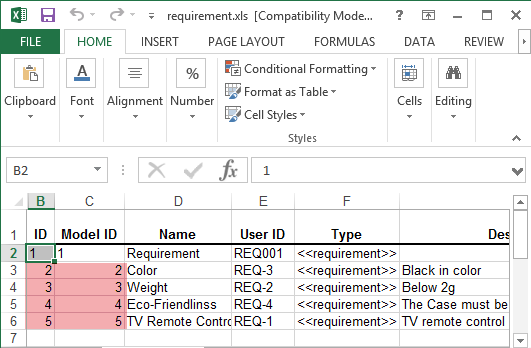
- Create a dummy model element which in the same model type as those you want to import. In this case, we create a requirement model.
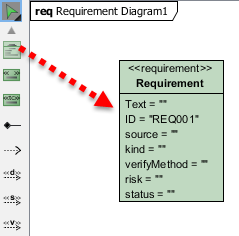
Create dummy requirement model.
- Go to Project > Export > Excel… from the toolbar.
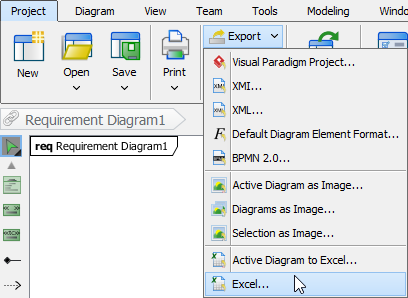
Export dummy model to Excel.
- In the Export to Excel dialog, select Model Type Per Sheet in the Export Style combo box. Make sure you have also selected the Export Tagged Values option. Switch to Model Elements tab and select the dummy requirement model. Specify the output path and press Export button to proceed.
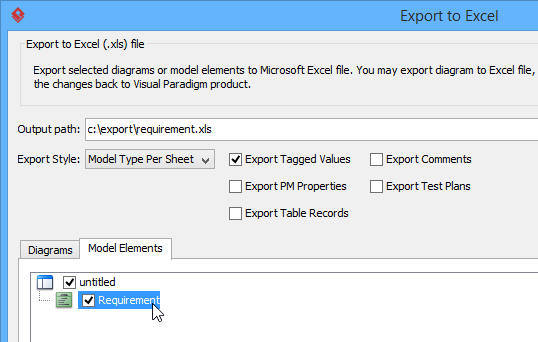
Specify export options.
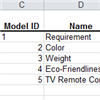
- Now open the excel file and fill in your data according to the format in the Excel file.
Fill in data to Excel file
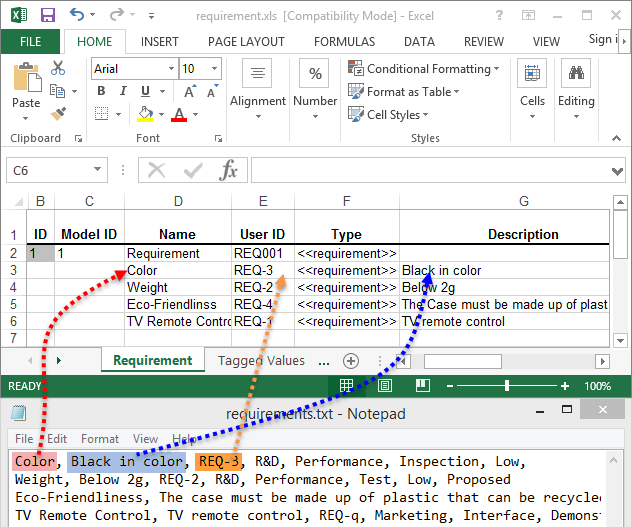
- Once you filled in the requirement data, you than have to assign a unique ID for each of the requirement. Please note that this ID number must be unique across your model.
Assign unique ID to model
- You can also define the extra properties under the Tagged Values sheet in your Excel file for your requirements as long as they are matched with the requirement models.
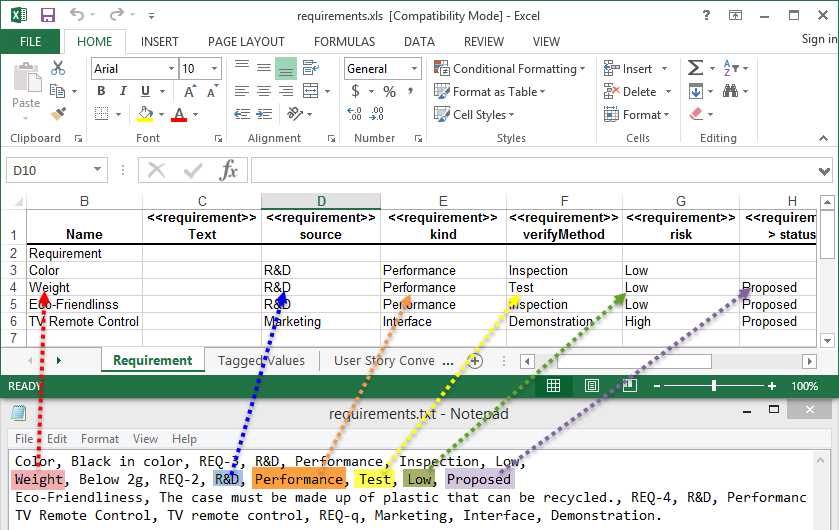
Fill in extra properties.
- If you have defined the extra properties, then please also specify the same ID to the row which you have defined in your requirement.
Define ID tag for extra properties which matched with requirements.
- Save your Excel file once you finish filling in the data.
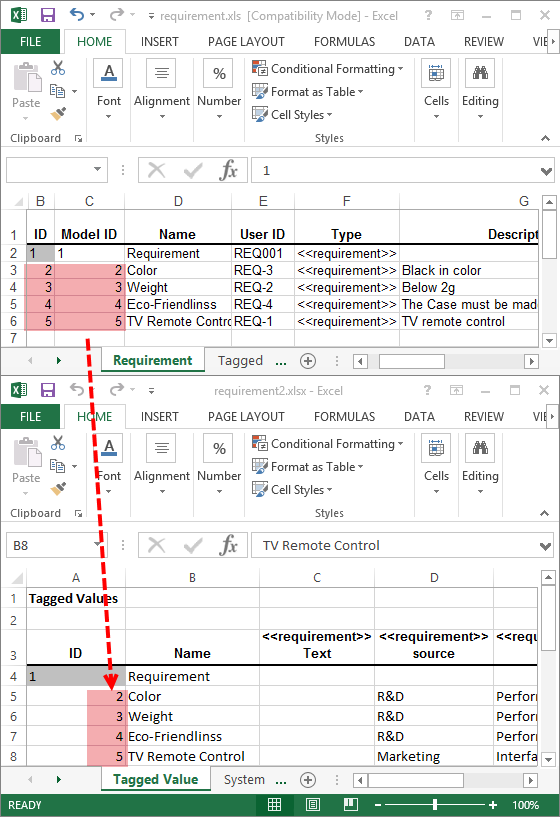
- Switch back to Visual Paradigm, Then go to Project > Import > Excel… from the toolbar to import it back.
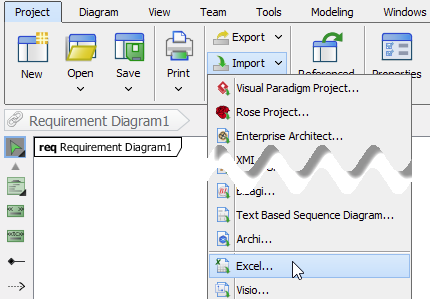
Import Excel file back.
- A summary of the affected model elements will be listed. In this case, it shows the requirements that are created to your project. Click OK to proceed.
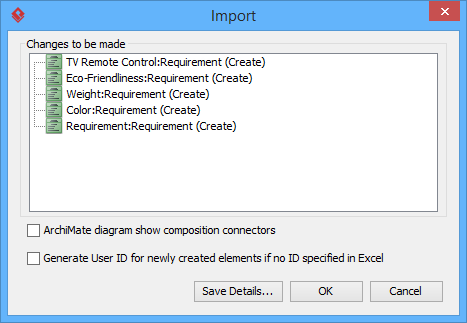
Summary of the models being imported.
- Open the Model Explorer by selecting View > Panes > Model Explorer from the toolbar. You can now drag & drop your requirements into the requirement diagram.
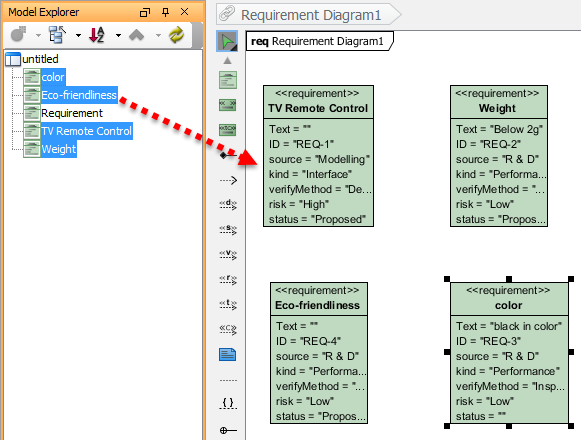
Put the imported models into diagram.
Related Articles |
Related Links |
Leave a Reply
Want to join the discussion?Feel free to contribute!