

Understanding BPMN Choreography Model
Choreography model is one of the types of models to specify choreographies in BPMN. It consists of choreography tasks and sub-processes and common BPMN elements, such as, gateways and events. In this article, you can study what choreography is and then learn how to draw a business process diagram with choreography tasks.
Choreography does not only describe what a business process does, but also define how individual process interact with each other. In short, it depicts all the processes and their required interactions in a business process diagram. However, unlike BPMN’s process, it doesn’t belong to any pool.

Choreography task
Before creating a business process diagram, you can create a model and model elements in shortcut through Model Explorer.
- Right click on the background of Model Explorer and select Model > New Model…from the pop-up menu.
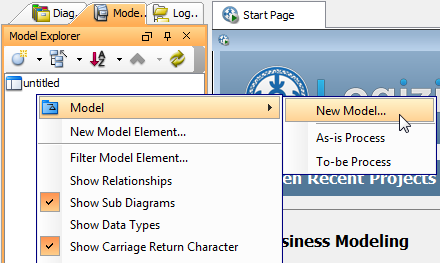
Add new model
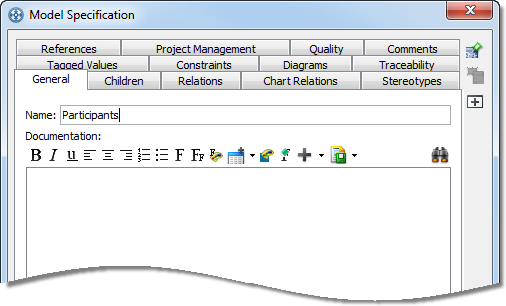
- In the pop-up Model Specification dialog box, name the model as Participants.
Name the model
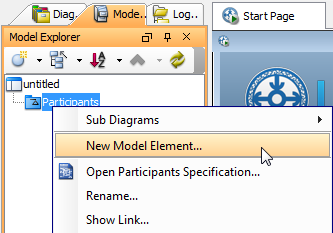
- Go to Model Explorer. To create a pool under Participants model, right click on Participants model and select New Model Element…from the pop-up menu.
Create new model
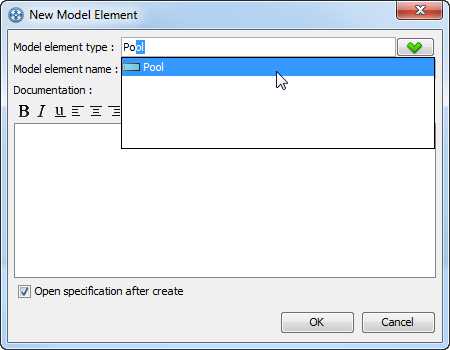
- In the pop-up New Model Element dialog box, select Pool from the drop-down menu of Model element type.
Create a pool
- Name the pool as Customer and then click OK button.
- Repeat the above steps to create another pool, Manufacturer.
The following figure shows the interaction between manufacturer and customer in a sale order process. To initiate the process, the customer places an order for an item. The manufacturer then replies the customer with confirmation.

BPD with choreography tasks
The first choreography task is Place Order as an interaction between two participants: Customer and Manufacturer respectively. Since Customer is the initiator of this interaction, it shares the same color of the task, the non-initiating participant is in gray. The second choreography task is Confirm Order. The same participants are interacting as the first choreography task. As we see, these participants are part of the choreography model and can be referenced by different choreography tasks. The distinction is that the initiator of the interaction in Confirm Order is Manufacturer.
Let’s follow the below steps to draw the above business process diagram:
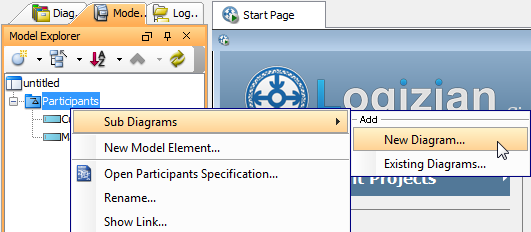
- Create a business process diagram under a model on Model Explorer. Right click on Participants model and select Sub Diagrams > New Diagram… from the pop-up menu.
Create a business process diagram
- In the New Diagram window, select Business Modeling on the left hand side. Then, choose Business Process Diagram and click OK.
- Create a start event by clicking Start Event from diagram toolbar and then clicking it on the business process diagram.

Create a start event
- Next, move the mouse over the start event, press Generic Resource icon and drag it to your preferred place. When you release the mouse, you can see a pop-up menu. Select Choreography Task from the pop-up menu.

Create a choreography task
- Name the task as Place Order.

Name as Place Order
- Right click on Place Order and select Open Specification…from the pop-up menu to specify participants for it.

Open choreography task specification
- Select Customer – Participants from the combo box of Participant 1, select Manufacturer – Participant from the combo box of Participant 2 and select Customer – Participants from the combo box of Initiating participant.
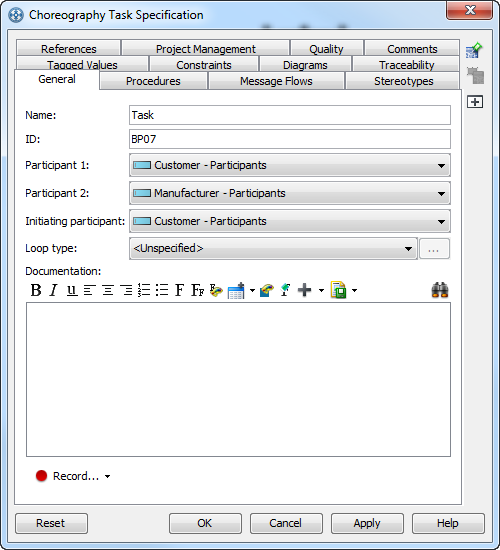
Choreography task
- Click OK button to confirm.
- Move the mouse over Place Order choreography task, press its resource icon Sequence Flow -> Choreography Task and drag it to your preferred place.
- Name the newly created choreography task as Confirm Order.

Create Confirm Order choreography task
- For Confirm Order choreography task, select Customer – Participants from the combo box of Participant 1, select Manufacturer – Participant from the combo box of Participant 2 and select Manufacturer – Participants from the combo box of Initiating participant.
- Finally, move the mouse over Order Confirmation, press Sequence Flow-> End Event icon and drag it to your preferred place to create an end event.

Create an end event
Leave a Reply
Want to join the discussion?Feel free to contribute!