Organize Data Models under Use Cases
In helping you organize your modeling project, use cases can act as generic containers for all software development artifacts. Development teams can group and locate design artifacts by navigating use cases.
In this tutorial we are going to show you how to create a new data model (i.e. entity relationship diagram) and associate that with a use case. And in future, you can easily identify existing associations as such by use cases and conveniently, be taken to the related diagrams right on the spot in just a few clicks.
Software we’ll use
In the demo, we’ll be using Agilian Standard Edition. If you like, you are welcome to download a free evaluation copy and the sample project files below to follow the example with.
Steps to create a data model and associate it with a use case
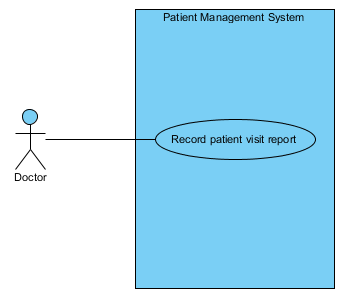
We’ll begin with the sample use case diagram below.
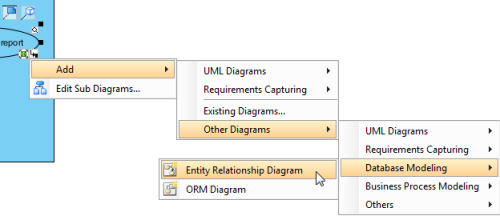
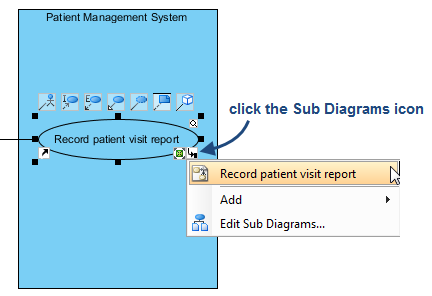
- Select the use case Record patient visit report. Click on the icon Sub-diagrams.
- From the popup menu, select Add > Other Diagrams > Database Modeling > Entity Relationship Diagram.
- A new entity relationship diagram (ERD) will open. (Initially, it is named Record patient visit report after the use case but you are free to change it as you wish.) At the top right corner, select Conceptual Model.
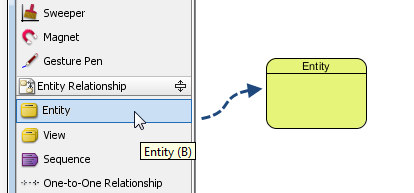
- From the diagram toolbar, drag Entity onto the diagram.
- Name the new entity Patient. Right click on it and then select New column to create 2 columns – name and address.
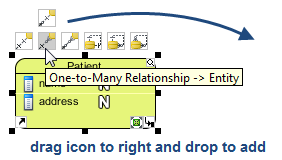
- Create a relationship from the entity Patient. Select Patient and drag the icon One-to-Many Relationship -> Entity to the right. Release your mouse button at where you want to place the new entity.
- Name the new entity Visit. Add 3 columns to it – visitDate, visitTime and description.
How to view the list of existing diagram associations and jump to one
Let’s say some time in the future you’re studying the sample use case diagram again. And you want to check and see which diagrams are related to the use case.
To do that, simply select the use case Record patient visit report and click the icon Sub Diagrams. On the popup menu, you will see its related diagrams listed at the top (i.e. Record patient visit report). If you click it, the entity relationship diagram we drew earlier will open. So you won’t have to search around to locate it.
Related Links
- Watch the video version of this tutorial
- YouTube video – how to define a custom property for use case
- YouTube video – Drill down from Business Process Diagram to Data Model





Leave a Reply
Want to join the discussion?Feel free to contribute!