Create Timing Diagram using Open API
 Timing diagram in Unified Modeling Language (UML) is a kind of interaction diagram. It is a special form of sequence diagram and focus on the time constraints of the interactions between objects. Instead of manually create the timing diagram, you can also generate it via Visual Paradigm’s Open API. In this article we will show you how to create timing diagram with Open API.
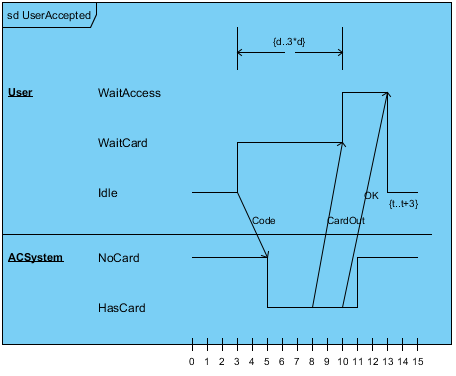
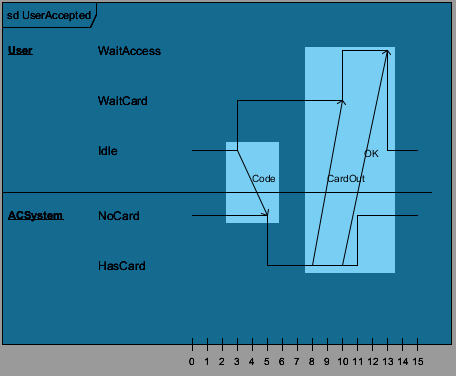
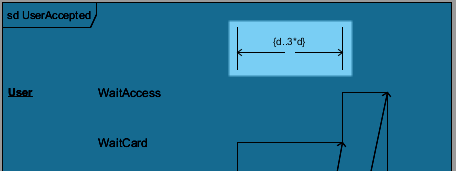
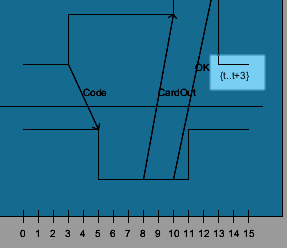
This is the timing diagram we are going to create. It consist of 2 lifelines, 5 states, 3 timing message and a duration constraint.
Create Blank Timing Diagram
Let’s start by create a blank diagram. We can use the DiagramManager.createDiagram operation to create a blank new diagram.
// create blank timing diagram
DiagramManager diagramManager = ApplicationManager.instance().getDiagramManager();
ITimingDiagramUIModel diagram = (ITimingDiagramUIModel) diagramManager.createDiagram(IDiagramTypeConstants.DIAGRAM_TYPE_TIMING_DIAGRAM);
Create Timing Frame and Time Unit
Once the diagram is created we can then start on create the timing frame. To create the frame:
// create a timing frame model
ITimingFrame frame = IModelElementFactory.instance().createTimingFrame();
frame.setName("sd UserAccepted");
// create a timing frame shape
ITimingFrameUIModel frameShape = (ITimingFrameUIModel) diagramManager.createDiagramElement(diagram, frame);
frameShape.setBounds(100, 100, 450, 370);
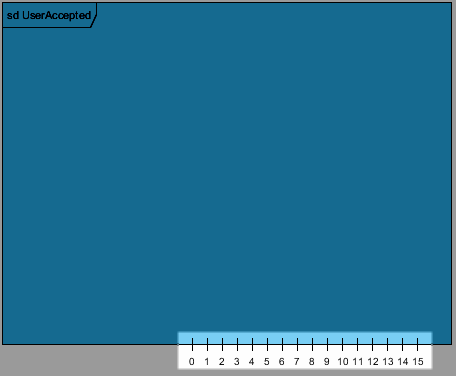
After the frame being created we can then create time unit on the frame.
// create an array to store all the time units
ITimeUnit[] timeUnits = new ITimeUnit[16];
// create 16 time units on the timing frame
for (int i = 0; i <= 15; i++) {
  ITimeUnit timeUnit = IModelElementFactory.instance().createTimeUnit();
  timeUnit.setName(i+"");
  frame.addTimeUnit(timeUnit);
  timeUnits[i] = timeUnit;
}
Create Lifeline and States in Timing Frame
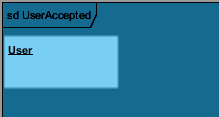
After create the frame we can create lifeline and states in the frame. To create lifeline:
// create the first lifeline in the timing frame
ILifeLine lifelineUser = IModelElementFactory.instance().createLifeLine();
lifelineUser.setName("User");
frame.addLifeLine(lifelineUser);
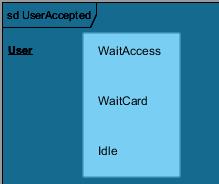
After create lifeline we then create states in it.
// create 3 states for the user lifeline
IStateCondition stateWaitAccess = IModelElementFactory.instance().createStateCondition();
stateWaitAccess.setName("WaitAccess");
lifelineUser.addStateCondition(stateWaitAccess);
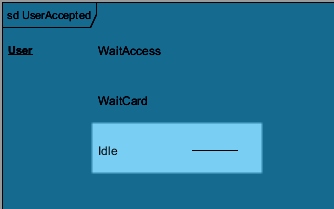
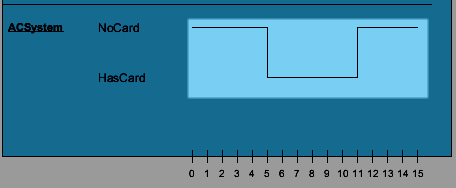
Now repeat the above and try to create the WaitCard and Idle state in user lifeline, and create the ACSystem lifeline as well as the NoCard and HasCard state by yourself.
Create Time Messages and Duration Constraint
Next we create the duration constraint and time message. To crate time messages:
// create the time messages, we will then
// set its start and end when working on the time instance of the lifelines
ITimeMessage timeMsgCode = IModelElementFactory.instance().createTimeMessage();
timeMsgCode.setName("Code");
frame.addTimeMessage(timeMsgCode);
Repeat the above to create the other two time message, the CardOut and OK. After that we move on to create the duration constraint:
// create duration constraint and specify its name
IDurationConstraint durationConstraint = IModelElementFactory.instance().createDurationConstraint();
durationConstraint.setName("{d..3*d}");
// add duration constraint to user lifeline
lifelineUser.addDurationConstraint(durationConstraint);
Please note that the start and end of the time message and duration constraint is not yet specified in here. They will be specified in the next phrase.
Create Time Instance on lifeline
Now we are on the most important part, the time instance on the lifelines. To create time instance:
// create time instance on user lifeline from time 0 to 3 it should be on Idle state
for (int i = 0; i <= 3; i++) {
  ITimeInstance timeInstance = ModelElementFactory.instance().createTimeInstance();
  timeInstance.setStateCondition(stateIdle);
  timeInstance.setTimeUnit(timeUnits[i]);
  lifelineUser.addTimeInstance(timeInstance);
  // specify the start of the Code message at time instance #3
  if (i == 3) {
    timeMsgCode.setStartTime(timeInstance);
  }
}
For the duration constraint, we can use the setStartTime and setEndTime to specify the start and end time instance.
Repeat the above to create other time instance, and specify the start and end of the time message as well as duration constraint by following the information below.
| User lifeline |
State |
||
| WaitAccess | WaitCard | Idle | |
| Time Instance | 10-13 | 3-10 | 0-3, 13-15 |
| ACSystem lifeline |
State |
|
| NoCard | HasCard | |
| Time Instance | 0-5, 11-15 | 5-11 |
| Time Message | Start | End |
| Code | 3 (Idle) | 5 (NoCard) |
| CardOut | 8 (HasCard) | 10 (WaitCard) |
| OK | 10 (HasCard) | 13 (WaitAccess) |
| Duration constraint “{d..3*d}” | Time Instance |
| Start | 3 |
| End | 10 |
Finally we create the Time Constraint on time instance #13 of User lifeline.
// add a time constraint to time instance #13
timeInstance.setTimeConstraint("{t..t+3}");
Show up the diagram
When everything is ready we can show up the diagram.
// show up the diagram
diagramManager.openDiagram(diagram);
Sample Plugin
The sample plugin attached in this article demonstrate how to create timing diagram using Open API. After you deploy the plugin into Visual Paradigm you can click the plugin button in the application toolbar to trigger it.
Download Sample Plugin
You can click this link to download the sample plugin.
Related Know-how |
Related Link |





Leave a Reply
Want to join the discussion?Feel free to contribute!