Customize a Logical View to Display Your Own Folder Structure
By default you can navigate your way through a project via default views such as those offered by Diagram Navigator and Model Explorer. While these standard views are readily available at your disposal, sometimes you may want one that is tailored to your specific needs.
Actually, by defining a logical view you can customize a view to display your own folder structure.
After you create a customized view in a project, you can even export it to an XML file which can be reused in other projects. If your development team is collaborating using Teamwork Server, different logical views will be merged automatically.
In this article, we are going to show you how to define a logical view and add both new and existing diagrams to it.
Note: We’ll be using Visual Paradigm for UML (VP-UML) in our example below.
How to Create a Logical View for New or Existing Diagrams
- In the left pane of VP-UML, click on the Logical View tab.
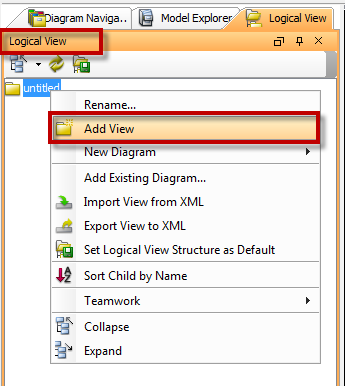
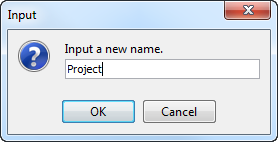
Right click on the tree’s root node (e.g. untitled) and choose Add View from the pop-up menu. - Enter a name for the new view (e.g. Project). Click OK.
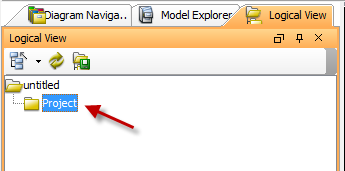
A view node called Project is created (under the node untitled selected in the previous step).
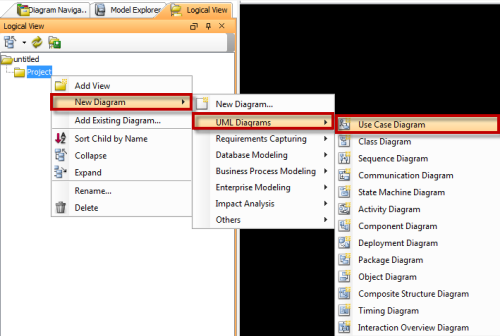
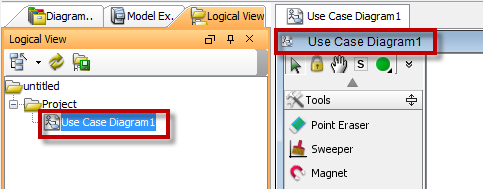
- To create a new diagram (e.g. use case diagram) within a logical view, right click on the view node Project. From the popup menu, select New Diagram > UML Diagrams > Use Case Diagram.
A use case diagram is created under the Project view node.
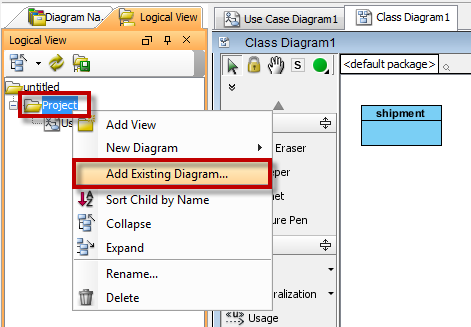
- To add an existing diagram (e.g. class diagram) to your view, right click on the view node Project. Select Add Existing Diagram… from the pop-up menu.
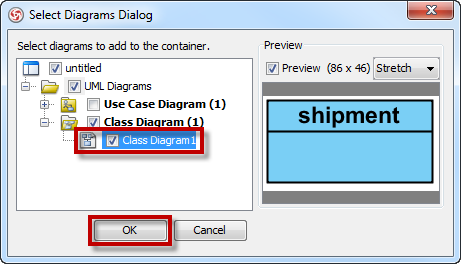
- In Select Diagrams Dialog, select the diagram you want to include in your view. Click OK.
How to Reuse a Logical View
There are two ways to make a logical view reusable after you define it.
- setting it as a default view
- exporting it to an XML file
Set Your View to be the Default View
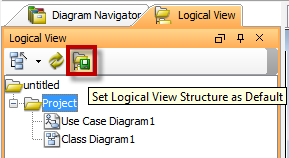
To set your current view to be the default view, click on the button Set Logical View Structure as Default above the view.
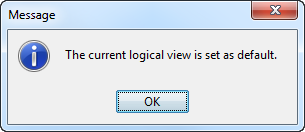
A message box will pop up confirming your default settings.
From now on, whenever you create a new blank project, your view (or folder structure) will appear in the Logical View pane.
Export a Logical View to an XML file
Another way to make your current folder structure reusable is to export it to an XML file, which can be imported to other projects for use. This ability also allows you to share your folder structure among the development team.
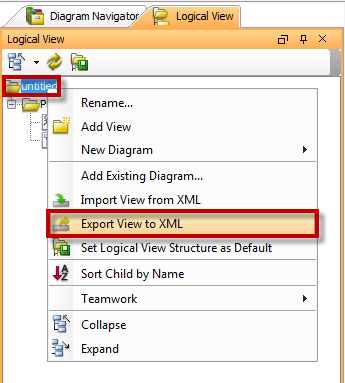
- Right click on the root node of the logical view structure and select Export View to XML from the pop-up menu.
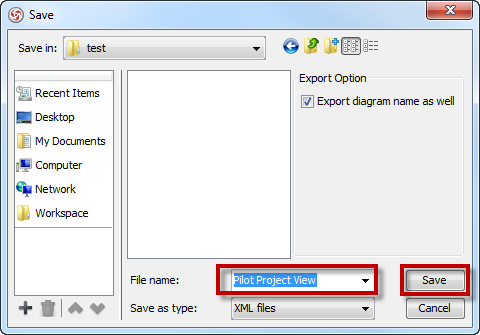
- In the Save dialog box, enter the file name. Click Save.
Import a Logical View from an XML file
To reuse your folder structure in other projects, you need to import the XML file (which was exported in the previous step).
Start with a new blank project.
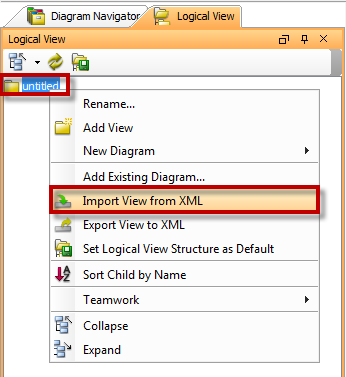
In the Logical View pane, right click on the root node and select Import View from XML from the pop-up menu.
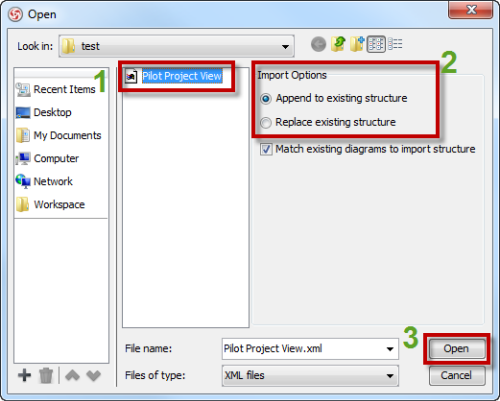
In the Open dialog box:
- Browse and select the xml file to import.
- You may select one of the 2 options for importing a logical view structure.
- Append to existing structure: the imported structure will be added to the current structure. (Note: The current structure will stay.)
- Replace existing structure: the imported structure will replace the current structure. (Note: The current structure will be removed.)
- Click Open to close the dialog box.



Leave a Reply
Want to join the discussion?Feel free to contribute!