How to Perform Refactoring
In an ideal world of system design, we’d probably want to create a generic library to store common components for reuse. That way, we can avoid creating the same components over and over again. Also, any changes you need to make to a component will automatically be rippled down to all projects which point to the same generic library.
When We Need Refactoring
For example, it is often that common components are identified only after a business process diagram (BPD) has been drawn. This is where the refactoring feature comes in. Through refactoring, you can create common components and put them into a designated generic library. In this process, components from that BPD will be extracted to that library and after which, that BPD will be automatically pointing to that library.
Note: In this tutorial, we might use the terms base library or generic library, interchangeably.
How to Use the Refactoring Feature
To demonstrate the refactoring feature, we’ll use an example of a pool in an existing business process diagram.
What You Need
- A project containing a pool in a business process diagram that you want to create a common component off of (which will go into a generic library)
- A base project or what we called a generic library. If you don’t have one already, create one by making a new blank project in Logizian (e.g. ‘base.vpp’)
Steps To Take
How to configure the base library and extract the pool to it
- Open the project you want to extract the pool from.
- Right-click the project root node in the Model Explorer to select Manage Referenced Project…
- In the Manage Referenced Projects window, click Add to specify the base/generic library.
- Select a project file to be the base library. Then click Close to close the Manage Referenced Projects dialog box.
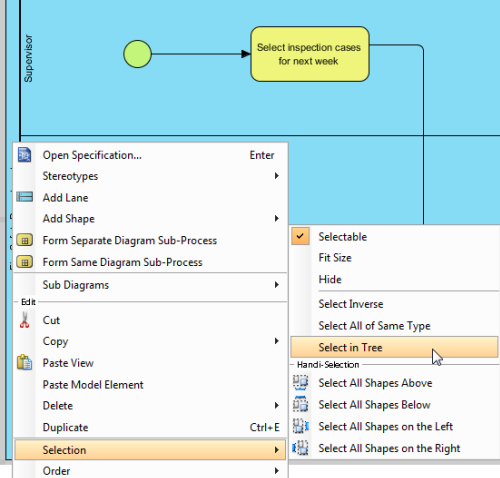
- Right-click on the pool in the diagram, choose Selection > Select in Tree
- In the Model Explorer, right-click on the pool (that you want to create a common component for and extract to the library) to select Refactor to Referenced Project…
- Click Yes in the Refactor to Referenced Project dialog box to begin refactoring.
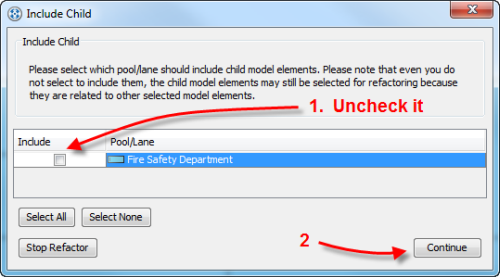
- In the Include Child dialog box, you have the option to extract the pool only and leave out all of its related tasks by unchecking the Include box. (Otherwise, the default settings will have the Include box checked and its tasks will also be extracted to the base library.) Click Continue.
- Click Yes in the Refactor to Referenced Project dialog box to check the master views.
- Click Continue in the Refactor to Referenced Project window.
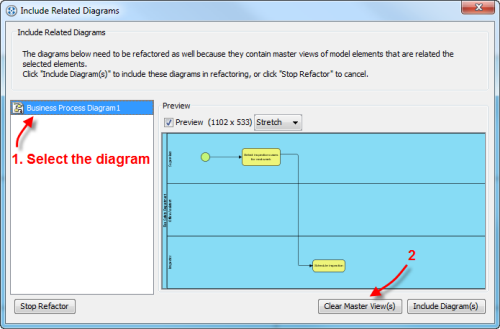
- In the Include Related Diagrams dialog box, select the diagram in the left column. Click Clear Master View(s) button for the children to stay in the current working project (as we’ve unchecked the Include Child option earlier).
- Click Yes to confirm clearing the master view(s).
- Click Yes to review which elements will be included in the refactoring. Click Continue.
- A message will pop up to confirm completion of the refactoring. Click OK.
How to Verify If the Refactoring Actually succeeded
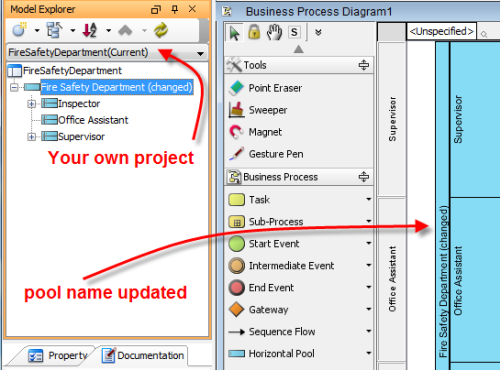
When you make a change to a pool in the base library (e.g. name change), you will see the same change in your own project that points to the same library.
We’ll continue with the example above.
Steps To Take
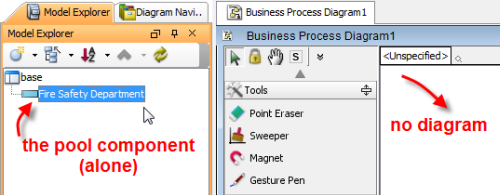
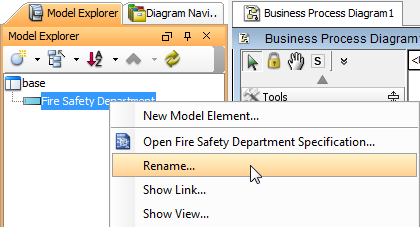
- Reopen the base library project ( e.g. base.vpp ). You should see the pool in the Model Explorer without any diagrams.
- Right-click on the pool to select Rename… Make the change. Save and close the base library project.
- Reopen your own project ( e.g. FireSafetyDepartment.vpp ). You should see the same change that you’ve just made in the base library.
You can view the interactive version of this trick in YouTube.


Leave a Reply
Want to join the discussion?Feel free to contribute!