

Building Document with Custom Templates
Although Doc. Composer comes with a complete set of built-in element templates, you may still want to customize or even to write your own templates for maximizing the efficiency of document design. You can accomplish this by writing and programming your own element templates.
In this article we will show you how to write your own template and use it in building a document.
Overview
Here is an outline of what will be covered in this article:
- Create an empty document in Doc. Composer
- Writing your own template and use it in building a document
In order to complete this tutorial, you must have the following software installed:
- Visual Paradigm 12.1 or higher
Getting started
- Download Article-Writing.zip.
- Unzip the downloaded file to obtain the .vpp project file.
- Open the file in Visual Paradigm.
- Open the class diagram Domain diagram. The diagram is as below. In this article we are going to write a custom template that lists out the operations’ details of all controller classes (i.e. classes with names ended with ‘Controller’).
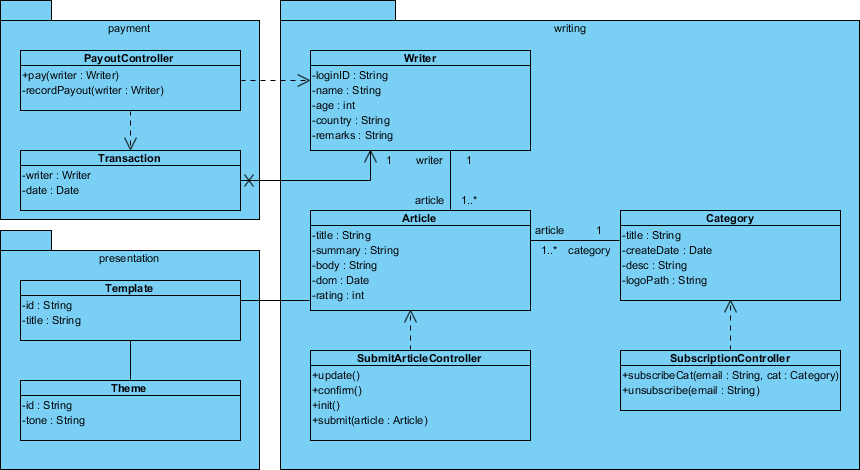
Class diagram
Creating an empty document
- Select Tools > Doc. Composer from the application toolbar.
- Click on Build Doc from Scratch.
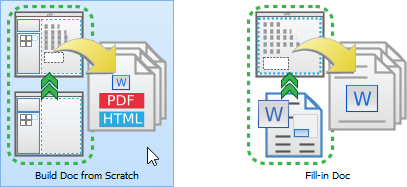
Select Build from Scratch
Your screen should look like this:
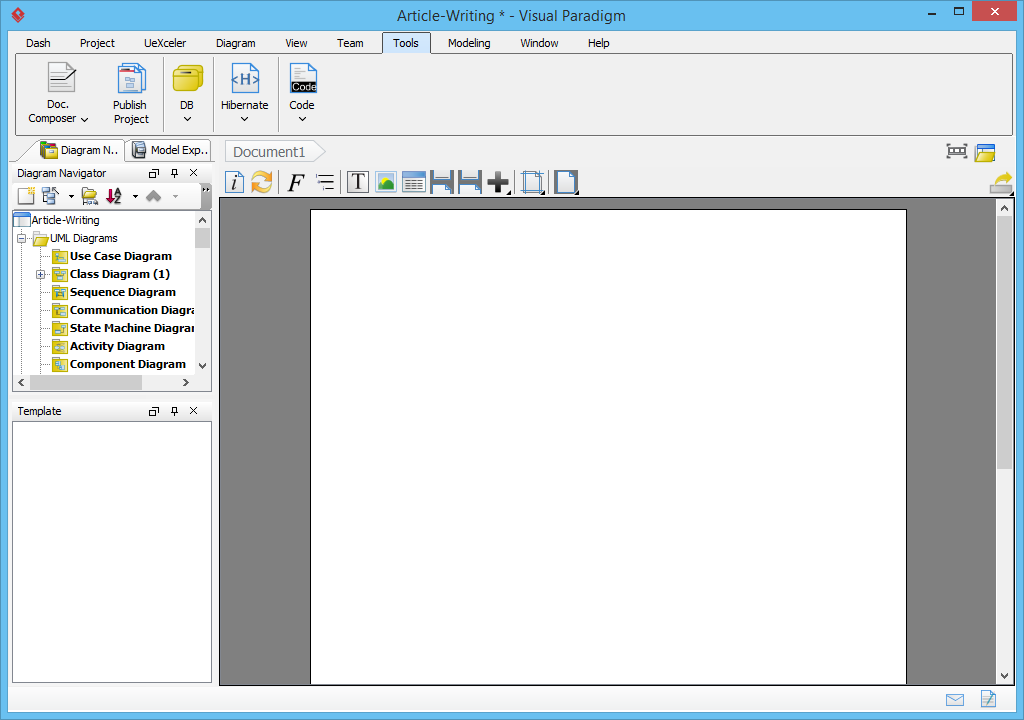
Doc. Composer
Writing your template
We are going to produce a document that lists out the operations’ details of all controller classes (i.e. classes with names ended with ‘Controller’) in a specific diagram. Here is the structure of document:
[class diagram image]
[for-each controller class]
[Class name]
[Table of operations]
[/for-each]
We are going to show you how to write an element template to produce such a document. To create a template:
- Each element template has to be written for a specific kind of project data. It can be a diagram type, a model element type, or even a project. For example, if you want to write a template to list out all use cases in a use case diagram, you should write a template for use case diagram. To begin with, select the type of project data in Diagram Navigator or Model Explorer. In this case, select the class diagram Domain diagram in Diagram Navigator.
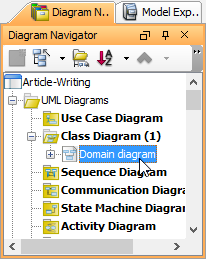
Selected class diagram
- The Template pane lists the templates available for the selected element type, in this case, class diagram. If your Template pane is hidden, select View > Panes > Property from the application toolbar (or press Ctrl+Shift+P) to show it.
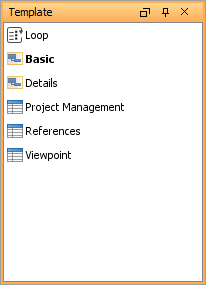
Templates listed
- You have to duplicate an existing template in order to create your own. Right click on ANY template and select Duplicate… from the popup menu.

Duplicate a template
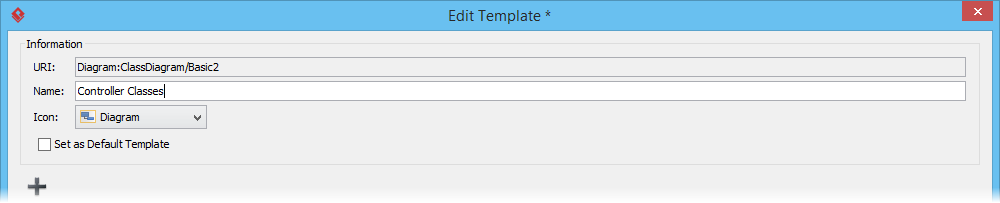
- In the Edit Template window, enter Controller Classes as the template name.
Entered template name
Here is a description of settings that you can see in the Edit Template window:
Name: The name of the element template, which is the name that shown under the Element Template Pane.
Icon: An icon that best represent the layout of content that will be produced by using this template.
Set as Default Template: Check this option if you want Doc. Composer to apply this template automatically when dragging elements directly from Diagram Navigator / Model Explorer onto document.
Template content: Editor for programming the template. - Copy the following template content and paste into the template editor.
<?xml version="1.0" encoding="UTF-8"?>
<DiagramBaseInitiationBlock>

  <!-- class diagram image -->
  <Property property="name" style="@heading+"/>
  <ParagraphBreak/>
  <Image alignment="center"/>
  <ParagraphBreak/>

  <IterationBlock modelType="Class">
    <Conditions>
      <ValueChecker property="name" operator="like" value="Controller"/>
    </Conditions>

    <!-- Name of class-->
    <Icon/>
    <Property property="name" style="@heading+"/>
    <ParagraphBreak/>

    <!-- Description of class -->
    <ValueChecker property="description" operator="not equals" value="">
      <Property property="description"/>
      <ParagraphBreak/>
    </ValueChecker>

    <ElementBaseInitiationBlock>

      <!-- Table of operations (show when has operations)-->
      <HasChildElementChecker modelType="Operation">
        <Text style="@heading+">Operations</Text>
        <ParagraphBreak/>

        <TableBlock colWidths="35, 65" tableStyle="Summaries">
          <TableRow>
            <TableCell>
              <Text>Name</Text>
            </TableCell>
            <TableCell>
              <Text>Description</Text>
            </TableCell>
          </TableRow>

          <IterationBlock modelType="Operation">
            <TableRow>
              <TableCell>
                <!-- Name of operation-->
                <Property property="name"/>
                <!-- Parameters of operation -->
                <HasChildElementChecker modelType="Parameter">
                  <Text> (</Text>
                  <IterationBlock modelType="Parameter" ignoreLastSeparator="true">
                    <Property property="name"/>
                    <HasValueChecker property="type">
                      <Text> : </Text>
                      <Property property="type" />
                    </HasValueChecker>
                    <Text>, </Text>
                  </IterationBlock>
                  <Text>)</Text>
                </HasChildElementChecker>
              </TableCell>
              <TableCell>
                <!-- Description of operation-->
                <Property property="description" style="Description"/>
              </TableCell>
            </TableRow>
          </IterationBlock>
        </TableBlock>
      </HasChildElementChecker>
    </ElementBaseInitiationBlock>

  </IterationBlock>
</DiagramBaseInitiationBlock>
Your template editor should look like this:
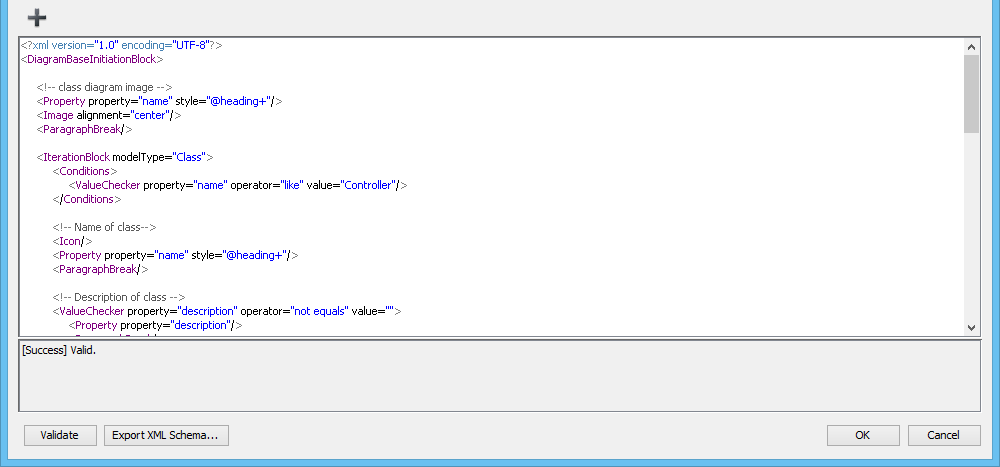
Entered template content
- Click OK to save the changes.
Using the template
Now you’ve defined a template. Let’s develop a document with it.
- Select the class diagram Domain diagram from the Diagram Navigator.
Selected class diagram
- Drag the template Controller Classes from the Template pane and drop it on the document.
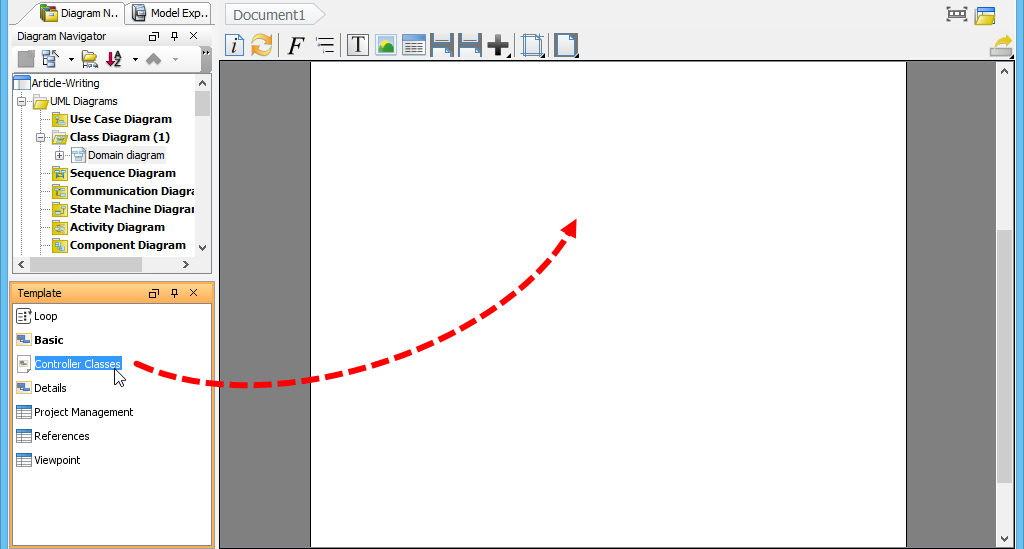
Dragging template to document
You should see an image of class diagram, along with the details of controller classes presented in the document, like the following.
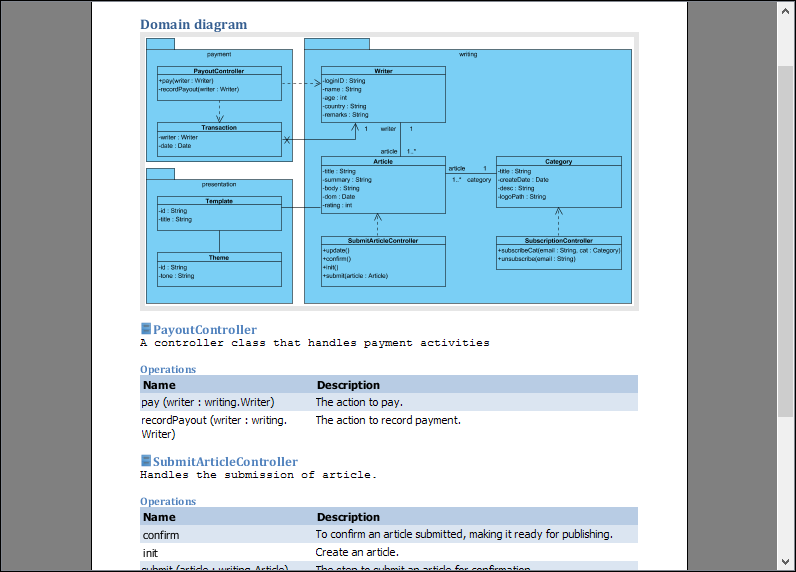
Document formed
- Click Export at the top-right corner of the document and select PDF Document… from the pop-up menu.
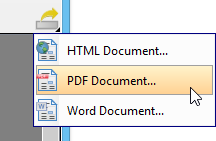
Export PDF document
- In the Export PDF Doc. window, enter the output path.
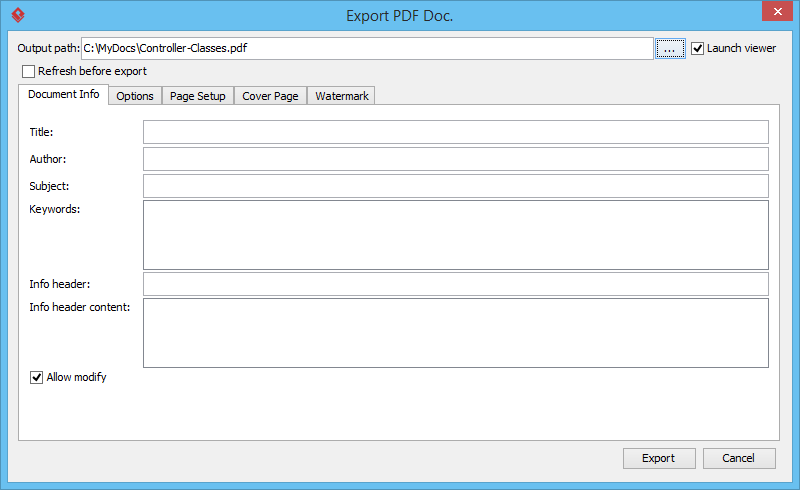
Export PDF Doc window
- Click Export. You obtain a PDF document like this:
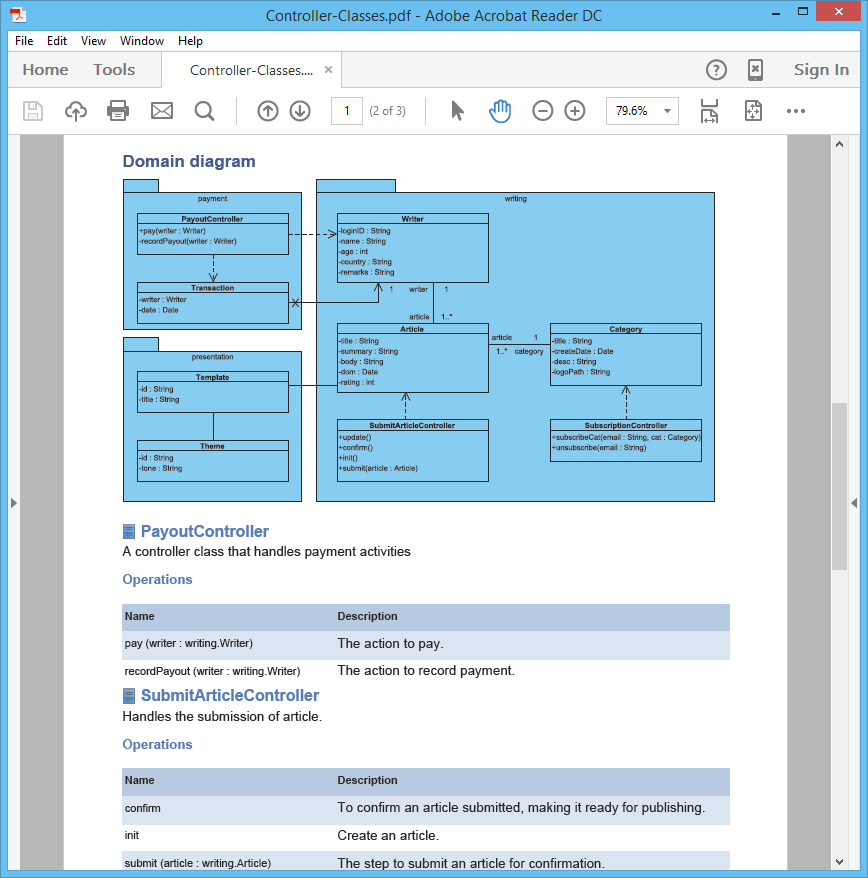
PDF document exported
Leave a Reply
Want to join the discussion?Feel free to contribute!