

How to Migrate to Visual Paradigm 15.2 Work Item Composer?
Starting from Visual Paradigm 15.2, a new work item authoring mechanism has been introduced, which makes the entire authoring process more seamless and effortless. It is recommended that users who upgraded from earlier versions start using the new Work Item Composer for authoring. Below we will walk you through the details.
The new mechanism works as follow:
- Work items’ definition are managed in Visual Paradigm Online / VP Server
- When you are opening a teamwork project with Visual Paradigm Desktop, you can open the authoring environment of work items via the toolbar (ITSM > Work Item Composer). This will open the Work Item Composer that lists out the work items being managed in server, and you can open a work item to edit it.
- Once you’ve finished editing, publish the change. This will update the definition of work items in server.
- Then, you can use the work items in your process:
- Process canvas – Drag work items from the palette onto the canvas or update existing work items
- Just-in-Time process – Drag work items from the gallery onto the process map or update existing work items
- To go back to the original project, click again the Work Item Composer button in the toolbar.
Compare to the old mechanism, the new one gives you the following benefits:
- You don’t need a separate project for managing your work items.
- You don’t need to perform any manual and tedious export and import in order to get the work items uploaded to server. All you need is a click to publish the changes to server.
It is recommended that you start using the new mechanism for authoring. The steps below outlines the steps you need to take:
Step 1 – Exporting your existing work items’ definition
In the previous versions, you should be managing your work items’ definition in one or more than one Visual Paradigm projects. For each of these projects, perform the actions below.
- Open the Work Item Composer by selecting ITSM > Work Item Composer from the toolbar.

You should immediately see the prompt below.
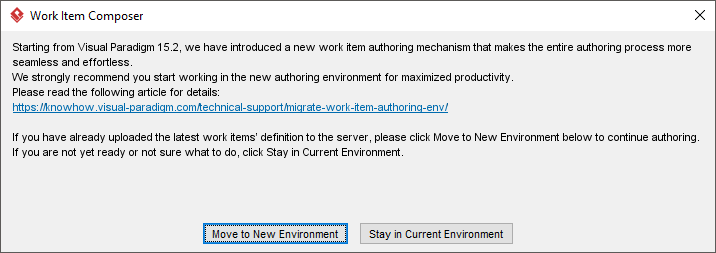
- Click Stay in Current Environment.
- Export your work items’ definition by selecting all the work items and then clicking the Export button at top right. Multiple selection of work items can be made by selecting the first work item, then press the Shift key and select the last work item.

- Save the work items’ definition as a dat file.
Repeat steps 1 to 4 on all the projects that contain your work items’ definition. Once the definition are exported, you should NOT modify the work items in these projects anymore. Instead, go through the steps below and start working in the new Work Item Composer.
Step 2 – Uploading your work items’ definition to server
You are going to upload the exported dat file (that contains the work items’ definition) to VP Online / VP Server. Note that the actions listed below are performed as part of the migration. Once the migration is done, you do NOT need to do this again (We will tell you how things will work in a minute).
- Open a web browser
- If you are using Visual Paradigm Online, visit Visual Paradigm Online and login as account manager. If you are using VP Server, visit your server URL and login as administrator.
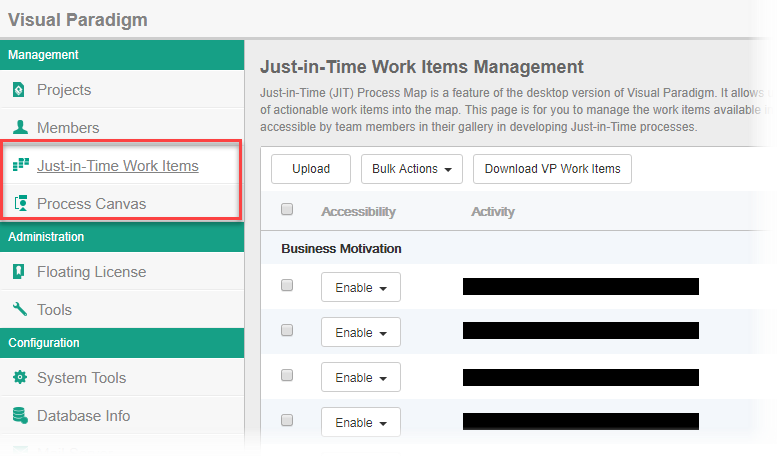
- Open the administrator panel.
- There are two menus on the left that you should pay attention to – Just-in-Time Work Items and Process Canvas.
- If your work items were developed for Just-in-Time Process Maps, select Just-in-Time Work Items and click Upload to upload the dat files to server. Similarly, for work items that were developed for Process Canvas, select Process Canvas and click Upload to upload the dat file to server.
Step 3 – Start working in the new Work Item Composer
The existing work items’ definition should have been uploaded to server and you can now carry on authoring in the new Work Item Composer.
- Go back to Visual Paradigm Desktop
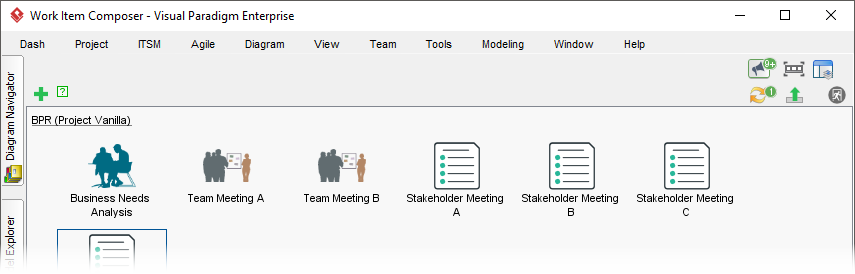
- From now on, you can open the Work Item Composer in any project by selecting ITSM > Work Item Composer from the toolbar. Once the Work Item Composer is opened, you can see Work Item Composer appear in the window’s title.

Step 4 – Retrieving work items’ definition
In order for Work Item Composer to list the work items uploaded, click the Refresh button.

After that, your work items should be retrieved from server.
And you can now begin authoring.
Step 5 – Exiting Work Item Composer
When you have finished authoring, there are two ways for you to return to the previous project:
- Method 1: Select ITSM > Work Item Composer from the toolbar.
- Method 2: Click on the Exit button at the top right of Work Item Composer.
This is the end of the migration process. Note again that the original project(s) you used to manage work items is no longer needed and you should NOT edit the work items there anymore.
The rest of the article will walk you through the authoring process in quick.
Creating/Editing work items and publishing changes
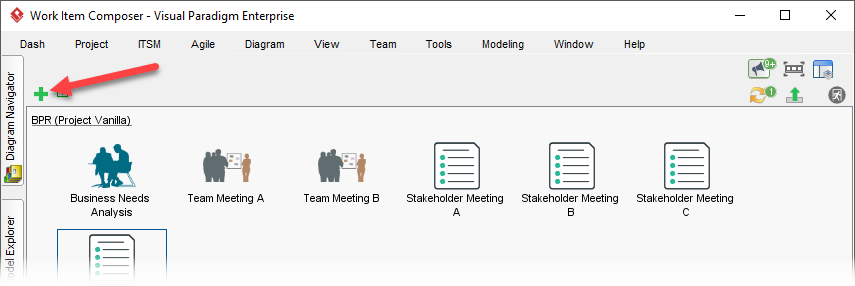
To create a work item for use in a Just-in-Time Process or Process Canvas, click the Add button at top left. Provide a name for the work item and start authoring.
When you have created or modified a work item, you can see a ‘tag’ attached to the top right of the work item, indicating the status of change made. To make a work item available to be used in a Just-in-Time Process or Process Canvas, you need to go through a “publish” process. To do this, click Publish at top right.

Customizing Just-in-Time Process / Process Canvas with your work items
You’ve created your own work items. In this section we will show you how to add them into a Just-in-Time Process / Process Canvas.
Permission setting
Before we continue, it is important to note that not all people in the team can make changes to a process. In order to modify a pre-designed process, one must fulfill either of or both the following criteria:
- He/she is running Visual Paradigm with Process Designer License
- He/she is granted the permission (see the image below for details)

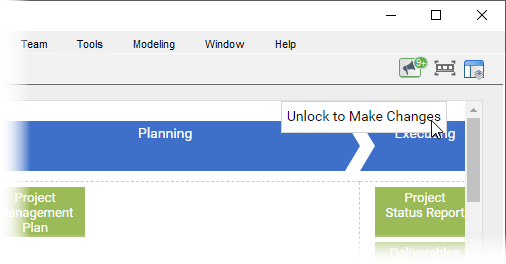
Just-in-Time Process
- Open the Just-in-Time Process that you want to make change.
- Click on Unlock to Make Changes at top right of the map. If you don’t see the button, you probably lack the permission said in the above section. Please check.
- Find your work item(s) from the gallery on the right. Drag and drop it onto the map.
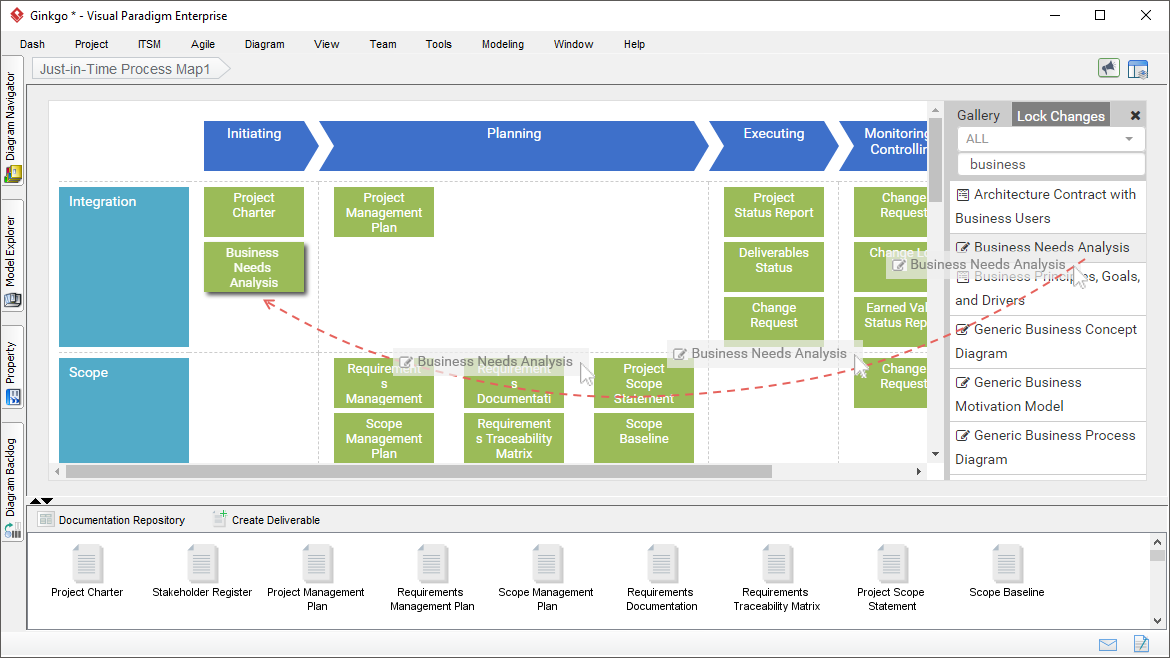
- Click Lock Changes at top right to confirm the changes.
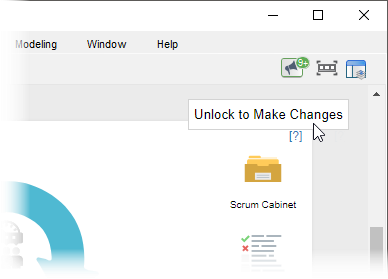
Process Canvas (Scrum / BPR)
- Open the Scrum Process Canvas that you want to make change.
- Click on Unlock to Make Changes at top right of the map. If you don’t see the button, you probably lack the permission said in the above section. Please check.
- You can see your work items listed in the palette on the left. Drag and drop a work item onto the canvas.
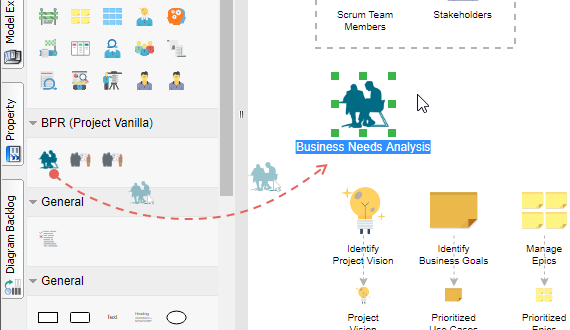
- Click Lock Changes at top right to confirm the changes.
If you have any questions, feel free to contact us at: [email protected]
Leave a Reply
Want to join the discussion?Feel free to contribute!