Running Visual Paradigm in Android Studio on MS Windows
 Android Studio is the official IDE for the development of Android applications. It is based on JetBrains IntelliJ IDEA. Starting from Visual Paradigm version 12.2 user can make use of Visual Paradigm IntelliJ IDEA Integration to integrate with Android Studio. But since Android Studio do have some fundamental differences with IntelliJ IDEA, some extra configuration will need in order to run Visual Paradigm in Android Studio on MS Windows (Linux and Mac users can simply integrate VP with Android Studio without extra configuration). This article will teach you how to integrate Visual Paradigm with Android Studio and perform the necessary configurations.
Integrate Visual Paradigm with Android Studio
To integrate Visual Paradigm with Android Studio:
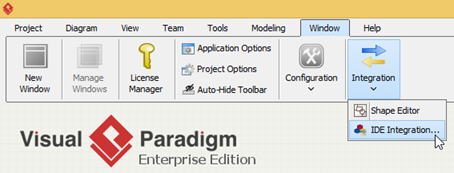
- In Visual Paradigm, select Windows > Integration > IDE Integration…
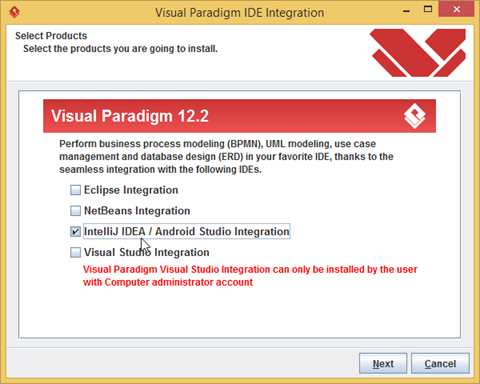
- Select IntelliJ IDEA / Android Studio Integration. Press Next to proceed.
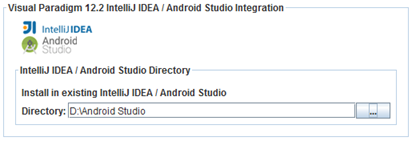
- Specify the installation directory of Android Studio by pressing the … Press Next to start installing the integration.
- Press Finish when integration complete.
Once the integration is done we can then run Visual Paradigm in Android Studio.
Configure Android Studio for Visual Paradigm
Running Visual Paradigm in Android Studio is a bit tricky. In IDE Integration environment VP will run on the working directory of the IDE. For IntelliJ IDEA its working directory is %installation folder%/bin, but for Android Studio its working directory was set to the bin folder of its JVM. Therefore the following adjustment will need to make in order to run Visual Paradigm on Android Studio.
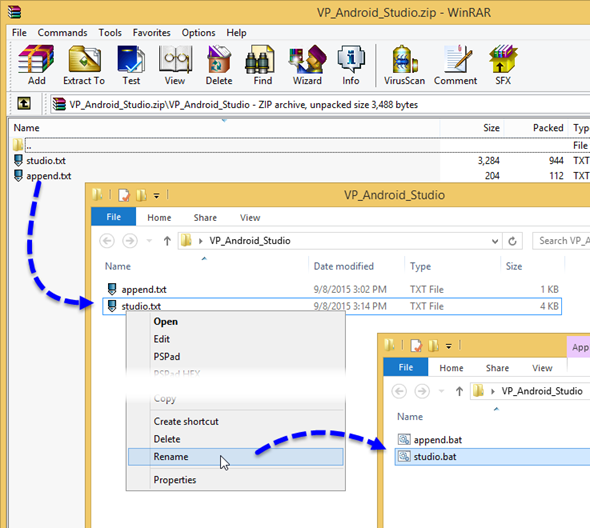
- Download the special batch files, unzip it and rename the files to .bat extension.
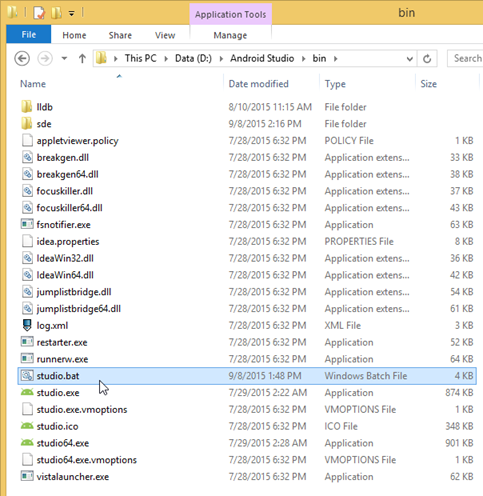
- Copy the studio.bat file (modified from IntelliJ IDEA’s idea.bat) to the bin folder of Android Studio installation directory.
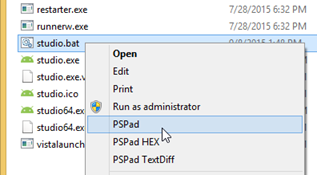
- Open studio.bat with your favorite text editor.
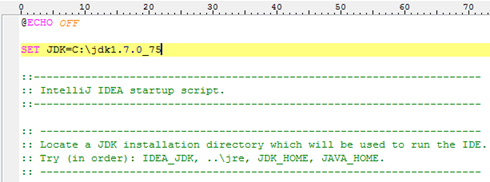
- Specify the JDK path in the JDK variable.
- Search for the variable COMMON_JVM_ARGS and modify the -Didea.paths.selector variable to make sure it is a same as the version of your Android Studio. In our example it is version 1.3.
- Save and close the studio.bat.
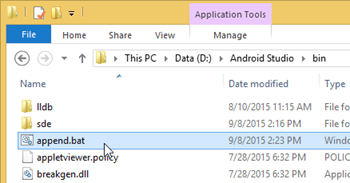
- Copy the append.bat file (copy from IntelliJ IDEA’s installation) to the bin folder of Android Studio installation director.
The Android Studio is now ready for running Visual Paradigm.
Launching Visual Paradigm in Android Studio
To launch Visual Paradigm from Android Studio:
- Double click on studio.bat to launch Android Studio.
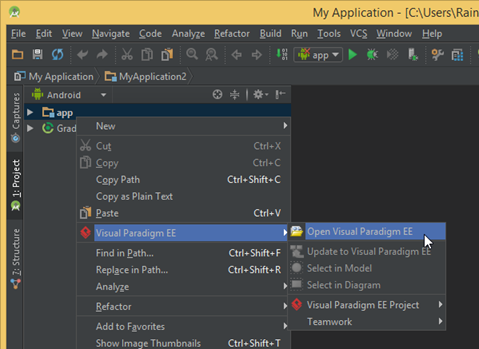
- Right click on your project in Android Studio and select Visual Paradigm > Open Visual Paradigm.
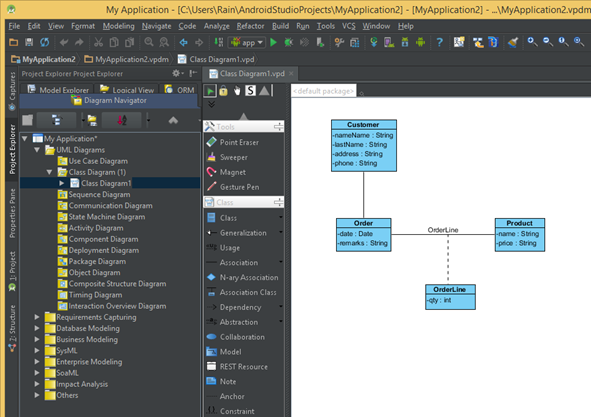
- Now we can create UML diagrams in Android Studio via Visual Paradigm.
Download special batch file for running Android Studio Integration
You can click this link to download the special batch file for running Android Studio Integration.
Related Know-how |
Related Links |



it is very simple tutorial.i love it .
i`ve got “No JDK found. Please validate either IDEA_JDK, JDK_HOME or JAVA_HOME points to valid JDK installation.” Windows 10, Android Studio 2.2.3
How can i find proper JDK ? Is there any simple solution ?
Please contact our support team in following page
https://www.visual-paradigm.com/support/
This was a simple yet detailed tutorial. You saved me countless hours that I would’ve spent searching Youtube for a decent guide. Thanks, mate!
Has this changed at all with Android Studio 3.0? Is there better integration or a simpler way to connect yet?