How to Present Model Elements with Custom Graphics in Trees
You can present the model elements in your diagrams with custom graphics using stereotype icons. These custom graphics not just apply to diagrams but can also display on various trees in the application.
Present model element with stereotype icon
To present model elements with custom graphic via stereotype icon:
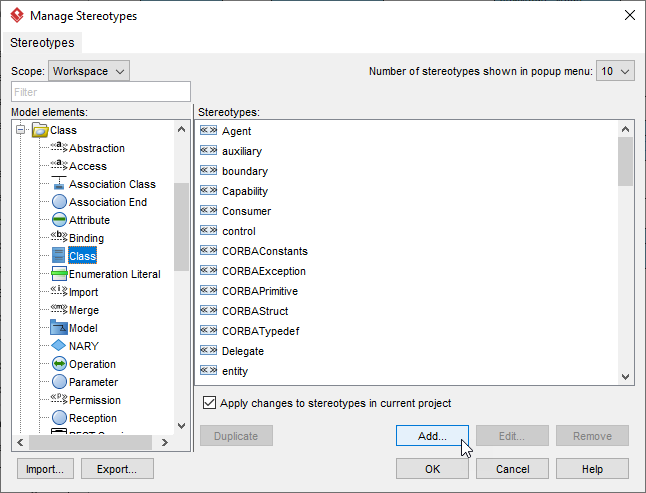
- Go to Window > Configuration > Manage Stereotypes.
- Select the model type, and press the Add button to create new stereotype.
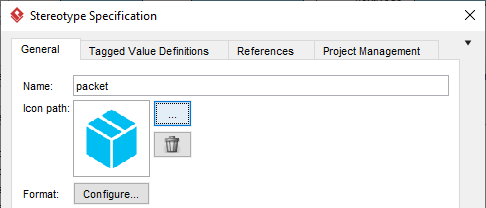
- Specify the name of the stereotype, then press the … button in Icon path to upload its icon.
- Press OK to confirm the change.
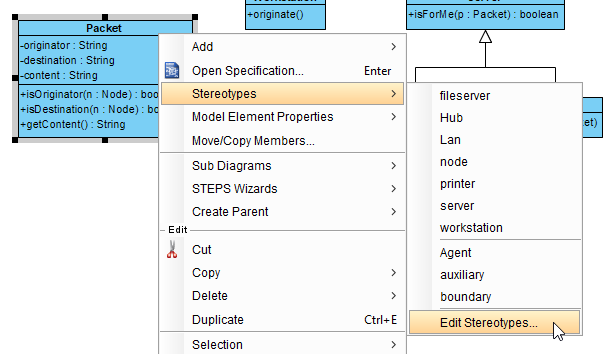
- Right click on the classes you would like to apply that stereotype and select Stereotypes > Edit Stereotype.
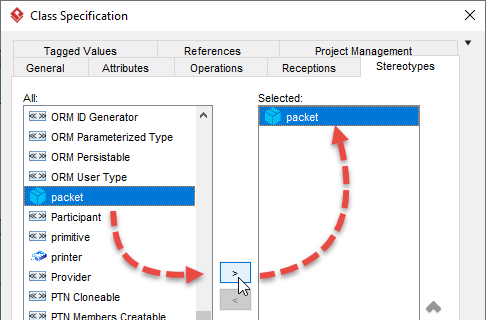
- Select the stereotype you defined and press OK to confirm the change.
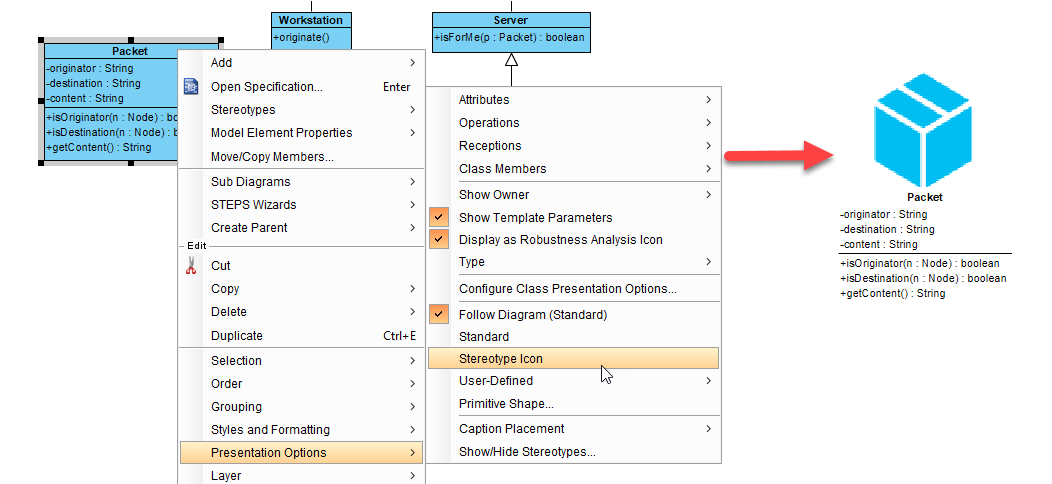
- Now the model will have stereotype icon showing at the top right. You can switch to present the model only using stereotype icon by right click on the element and select Presentation Options > Stereotype Icon.
Show stereotype icons in trees
To present model elements with stereotype icon in various trees in application:
- Go to Window > Application Options.
- Select View, enable Show stereotype icon for model elements in tree.
After that elements will show with its stereotype icons in various trees, such as Diagram Navigator, Model Explorer, etc…
Related Know-how |
Related Link |




Leave a Reply
Want to join the discussion?Feel free to contribute!