

Running Floating License with VP Online (VPository)
VP Online is a free cloud service for Visual Paradigm users to perform various team collaboration activities such as version control, change management, task management, agile requirement capturing, etc. Now floating license users no longer need to setup their own floating license server. They can host their floating license using VP Online for reduce their administration work. This also enable their license accessible from any place around the word without the needs of setup of any VPN or special tunnel. This article will show you how to configure your VP Online workspace to host your floating license.
Subscribe to VP Online
If you not yet subscribe to VP Online then you can subscribe one by select Team > Select Repository.

Select Repository
After press the Sign up button under Sign up VP Online. Follow the wizard to complete the process.
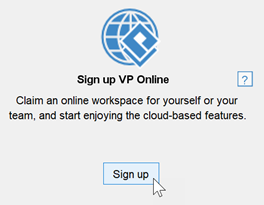
Sign up VP Online
Setup Floating License in VP Online
Once you subscribed to VP Online you can use it to host your floating license.
- Visit your VP Online via browser.
- Press the Login button at the top right to login to your VP Online with your Manager Account (the original subscriber of the VP Online).
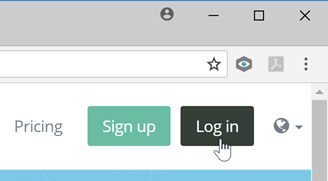
Login to your VP Online workspace
- Press on your name at the top right to open the popup menu, then select Administration.
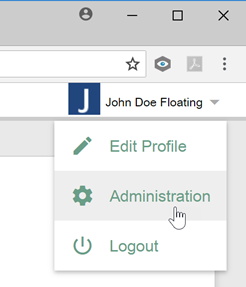
Administrate your VP Online workspace
- Select Administration > Floating License on the left menu. *Please note that if the Floating License menu is not showing then please follow the article to enable desktop product related feature in your VP Online Workspace.

Select Floating License in menu
- Downloaded from your Customer Service Center account, then press the Choose File button next to Floating License Key file to upload your floating license key.
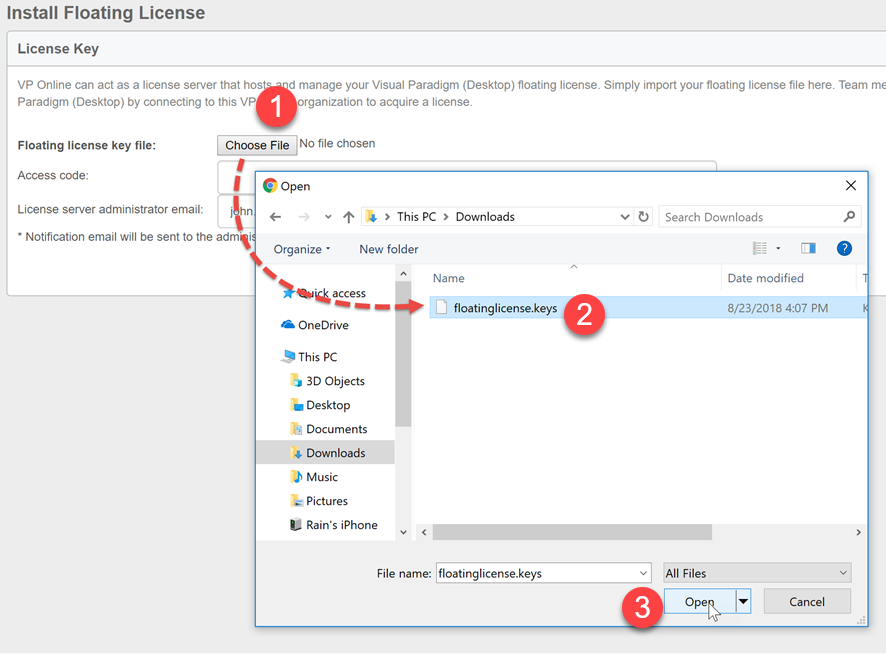
Upload floating license key to VP Online
- Since VP Online can be access all over the world, it is important to protect your license from unauthorized usage by providing access code. Enter Access Code for your license so that only user knowing the code can access to the license.
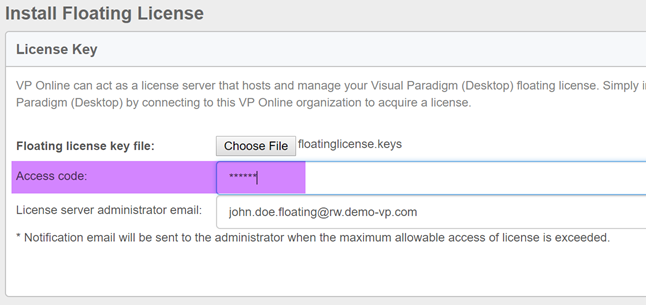
Define access code for floating license
- You can optionally change the license administrator email so that he will get notified when there are abnormal activities being recorded on your floating license.
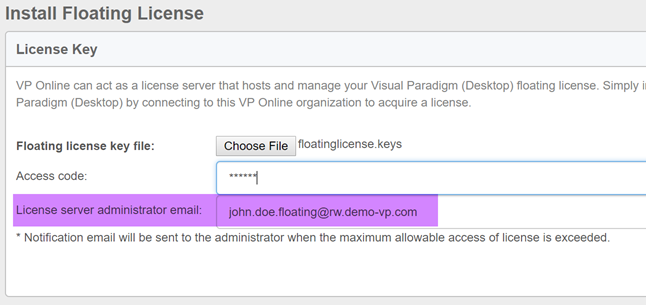
Specify license administrator email
- Once everything is done, press Install button to proceed.
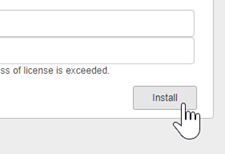
Install floating license to VP Online
- Now the floating license is ready in your VP Online.

License ready in your VP Online
Configure VP Client Acquire Floating License from VP Online
On VP client side:
- Select Perpetual License when License Manager dialog showing up (either from the first time launching the software, evaluation license expired, or manually open from Window > License Manager).
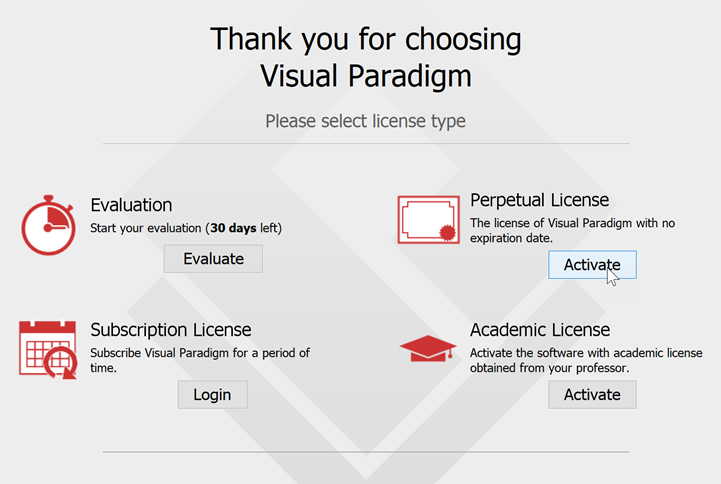
Select Perpetual License in License Manager
- Select Floating License.
Select Floating License
- Change the connection protocol to vponline://

Change connection portocol to vponline://
- Enter the workspace ID of your VP Online (copy from System Tools of the Administration portal of your VP Online) as well as the Access Code defined to your floating license. Press Connect to Server button to acquire for license.
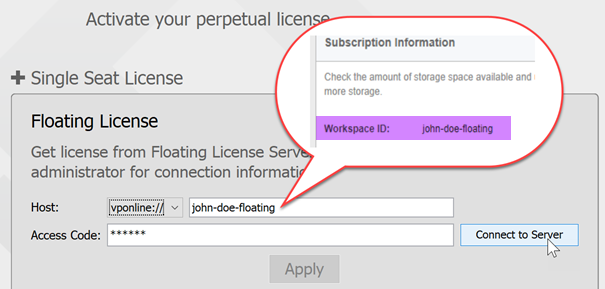
Specify connection details, access code and connect to VP Online
- After that the available licenses will be showing. If you have floating licenses in multiple editions with the same access code then you can select the edition you would like to start with.

Apply license from VP Online
- Press Apply button then Visual Paradigm will be launched using the floating license key in your VP Online.
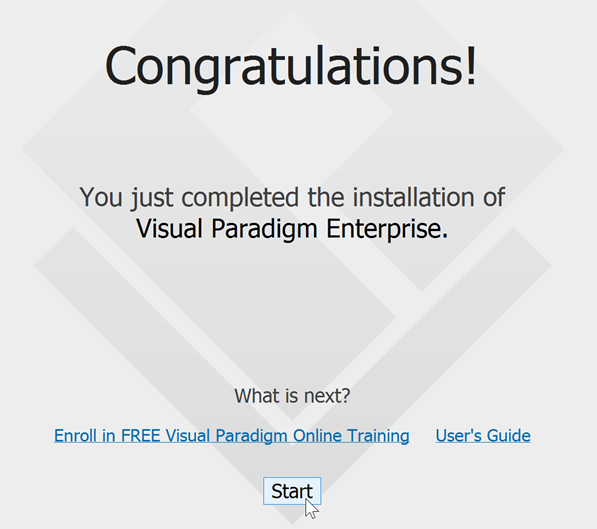
Visual Paradigm starts with floating license from VP Online
Related Know-how |
Related Link |
Leave a Reply
Want to join the discussion?Feel free to contribute!