Import Diagram into Teamwork Project
When you are working as a team member, the designs (diagrams) you draw in your project will be committed to server and will also be visible to other people in the team. Sometimes, you want to sketch out new ideas but without having them visible to other people as the sketches are just raw designs. One good way to perform sketching is to do it in a new project rather than the working one. At the end, import the needed part(s) back to the teamwork project and commit it to server to make it visible to others.
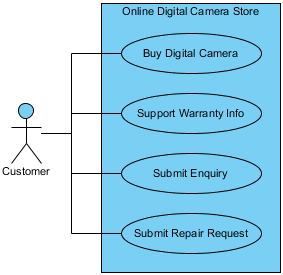
In this article, we will walk through the process of creating sketches in a separate, new project, and finally import one of the diagrams back to the working copy. Here you are a system designer of an online digital camera store. This is the use case model of the system to be implemented:
Now, you are thinking of the flow of the use case Buy Digital Camera. There are several possible solutions in your mind and you want to visualize them with sequence diagrams. This is the beginning of the story. Let’s see what comes next…
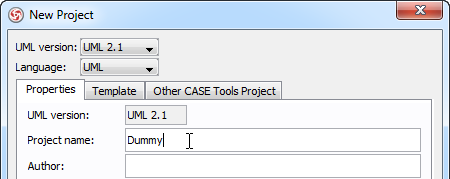
- Since the ideas are still in brainstorming stage, to avoid having them mixed up with the teamwork project, you try to visualize them in a separate project. Create a new project first (File > New Project). Give the project a name – Dummy(or whatever you like, just to indicate that it is for storing your sketches).
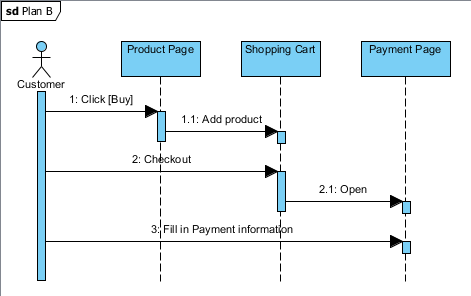
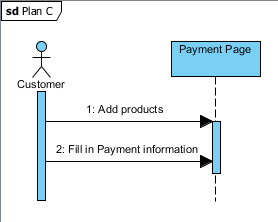
- Visualize your ideas in the new project. Here you have three possible solutions for how to accomplish the use case of buying digital camera. Let’s take a quick look.
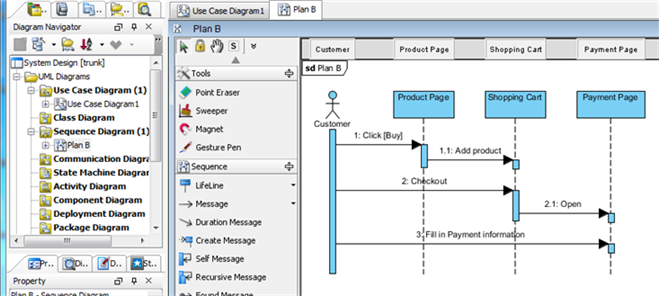
Plan A – Click on the Buy button in product page, and pay through the redirected payment page.Plan B – Click on the Buy button in product page to add the product to shopping cart, and finally pay through the shopping cart page.
Plan C – Visit the payment page. Add the items to buy. Pay in the same page.
- You start to study the three designs, compare between them, and list out their pros and cons. You also print them out and discuss with the representative in the digital camera store. Finally, you decided to adopt plan B.
- Having decided plan B to be the solution, you want to migrate the design to working project. Instead of re-drawing the same diagram in the working project, you make use of the import-and-export function. Save the dummy project first (File > Save Project).
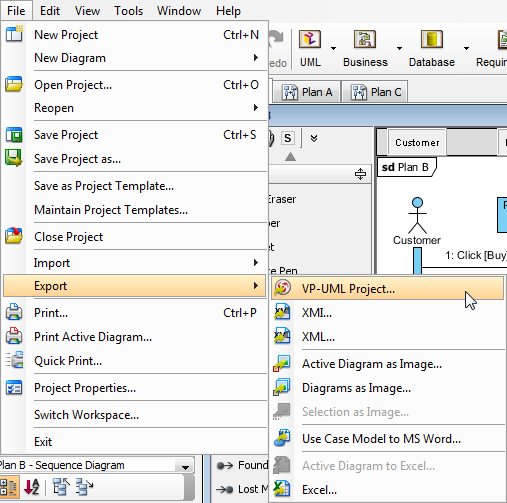
- Select File > Export > VP-UML Project… from the main menu.
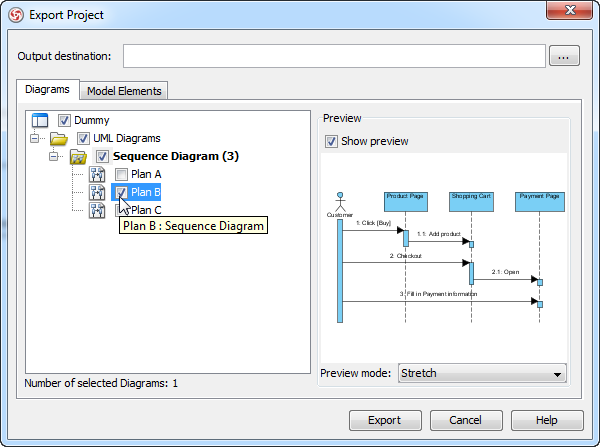
- In the Export Project window, select Plan B in the diagram tree. You do this because you want to export the sequence diagram of plan B, not the other disregarded designs.
- Specify the output destination of the exported .vpp project file. Click Export.
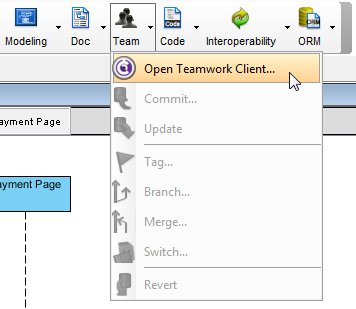
- You need to open the working teamwork project now. Press Team in the toolbar, and select Teamwork Client…from the drop down menu.
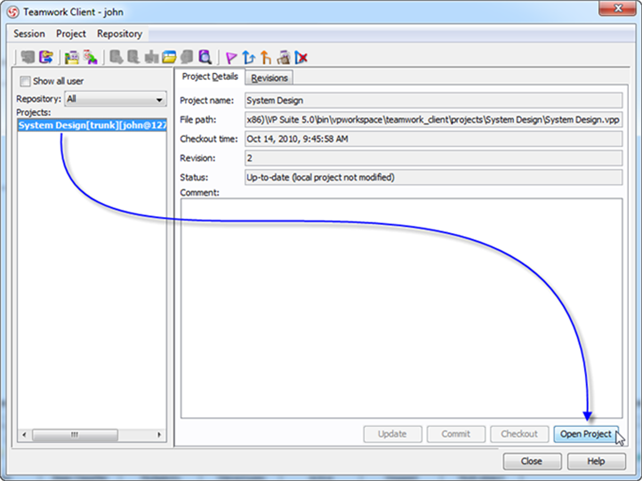
- Select the original working project and click Open Project.
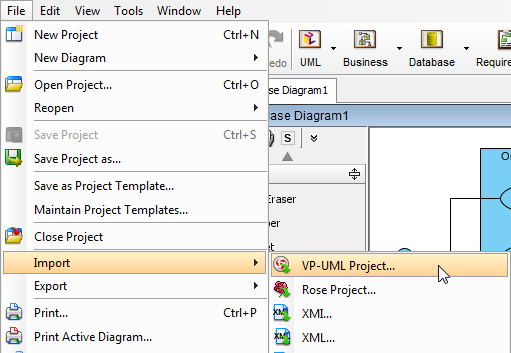
- Having opened the working project, select File > Import > VP-UML Project… from the main menu.
- Select the project exported in step 7 to import. Now, you see the adapted plan, Plan B, appears in the working project.
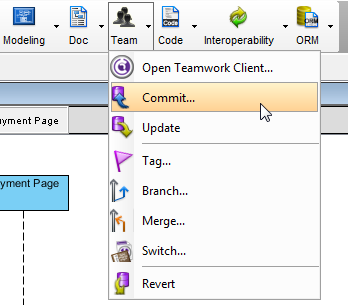
- Time to commit your work. Press Team in the toolbar, and select Commit…from the drop down menu. Follow the instruction on screen to finish up the commit process.
This is the end of the story. Hope you enjoy it. 🙂
How to try the sample
Download Dummy and then unzip it to get the .vpp project.




Leave a Reply
Want to join the discussion?Feel free to contribute!