Overview of Team Collaboration Support
| Team collaboration development on CVS, SVN, Perforce and ClearCase had been discontinued starting from Visual Paradigm version 13.0 |
Visual Paradigm supports collaborative and concurrent modeling, and versioning of works in the following ways:
- Visual Paradigm Teamwork Server (A native product developed by Visual Paradigm)
- SVN
- CVS
- Perforce
- ClearCase
In this page, we will have an overview on how administrator and team members can work together with Visual Paradigm’s team collaborative features, and to clarify some of the major concepts in collaborative modeling.
Administrative tasks (for Teamwork Server only)
Idea
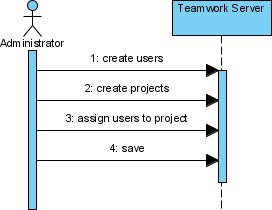
Idea of administrator task for Visual Paradigm Teamwork Server user
Administrator refers to the persons who have the right of creating users and projects. In order for the team to start working, administrator must create the necessary users, projects and grant users with read/write permissions on projects.
Steps
- Start the Teamwork Server by executing StartTeamworkServer in the bin folder of Teamwork Server directory.
- Execute TeamworkServerAdmin in the same folder.
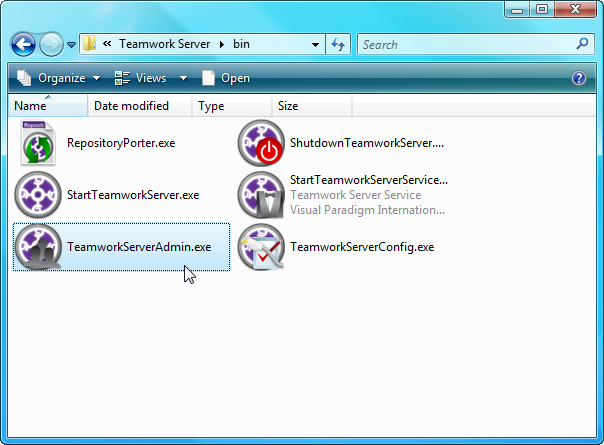
To run teamwork server administrator
- Login as administrator (default user name and password are “Admin”).
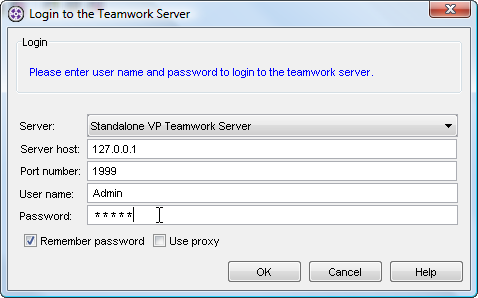
Logging into teamwork server
- In the Users tab, click Add to add a user. Repeat the step to create all users.
- In the Projects tab, click Add to add a project and assign user(s) to project. Repeat the step to create all projects.
Administrative tasks (for SVN, CVS and Perforce)
Idea
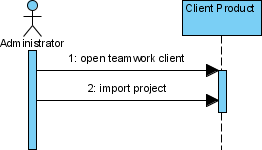
The idea of administration task for SVN, CVS and Perforce users
Administrator refers to the persons who have the right of creating users and projects. In order for the team to start working, administrator must setup the server, and import projects server through client product such as VP-UML.
Steps
- Start the client product such as VP-UML.
- In client product, open the Teamwork Client. For VP-UML, select Teamwork > Open Teamwork Client… from the main menu.
- Login to the server.
- In the Teamwork Client window, select Project > Import Project to Repository.
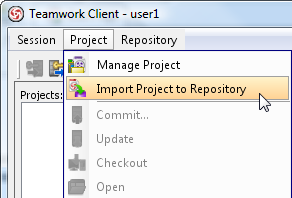
To import project into repository
- In the Import Project window, either create a new project, to import the currently opening project or import an external project file to server. Click OK to proceed.
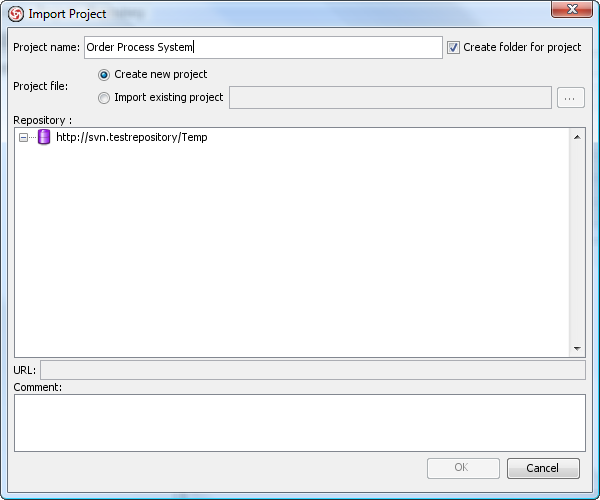
Creating a project in server
Checkout and open project
Idea
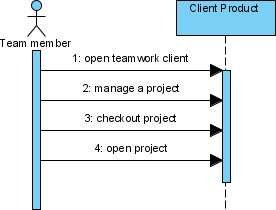
The idea of checking out and opening project
Once the users and projects have been setup, team members can start working by logging into the Teamwork Client in client products, such as VP-UML, manage, checkout and open the project.
Manage project is to tell the client products that you are involved in a particular project.
Checkout project is to download a managed project from server to your machine.
Open project is to open the downloaded project in the running client product.
Steps
- In client product, open the Teamwork Client. For VP-UML, select Teamwork > Open Teamwork Client… from the main menu.
- Login to the server.
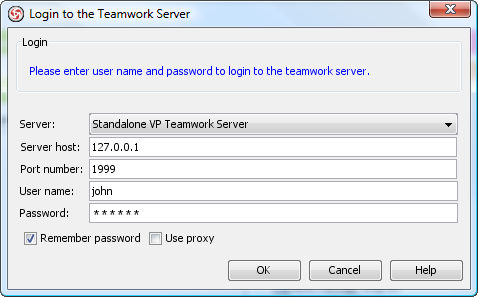
Logging into teamwork server
- In the Manage Project window, select the project(s) to manage.
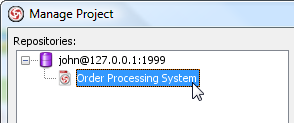
To manage a project
- Select the project on the left hand side for checking out.
- Click Checkout at the bottom right of Teamwork Client window.

To checkout the chosen project
- Click Open Project.
Commit
Idea
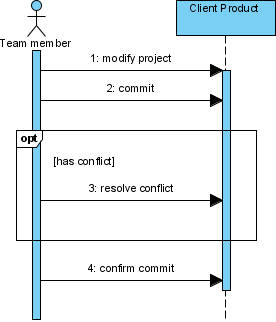
The idea of committing change
Once a team member has opened a project, he/she can start modeling. Whenever the member want to upload the changes to server, he/she can perform a “commit”.
Commit means to upload local changes to server. During the process, there may be conflict if any change you have made cause an unresolvable contradiction with change(s) made by others. For instance, your teammate has renamed use case “register” to “signup”, and has committed the change, and you have renamed the same use case to “enroll”. In this case, you need to decide whether to keep your change (i.e. overwrite) or to take your teammates’ (i.e. revert). You must resolve the conflict in order to proceed with committing.
Steps
- With some modifications, select Teamwork > Commit…from the main menu.
- Review the changes to be committed in the Commit dialog box and click OK to proceed.
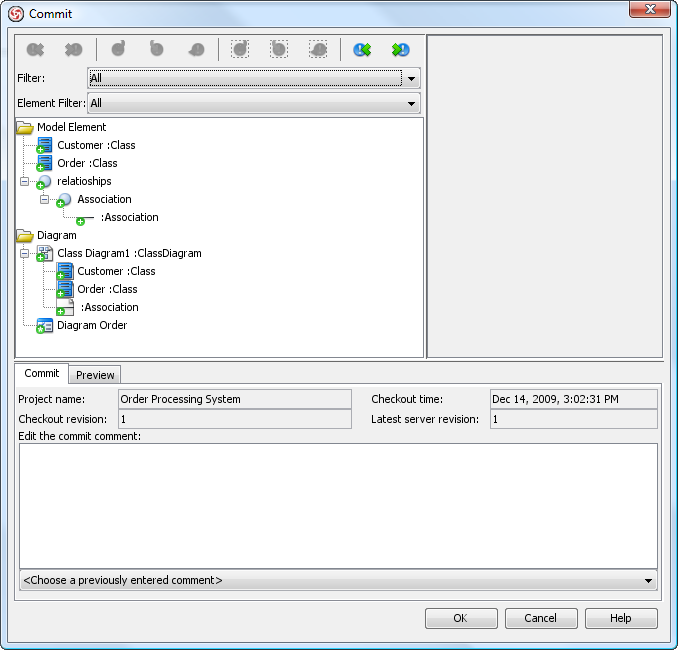
Resolving conflicts
Update
Idea
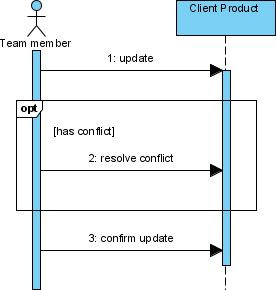
The idea of updating changes
When a team member want to obtain others’ committed changes, he/she can run an update.
Update means to pull the changes from server to local. Same as commit, update may also cause a conflict between the server copy and local copy. You must resolve the conflict in order to proceed with updating.
Steps
- Select Teamwork > Update… from the main menu.
- In the Update window, review the changes to be updated and click OK to proceed.
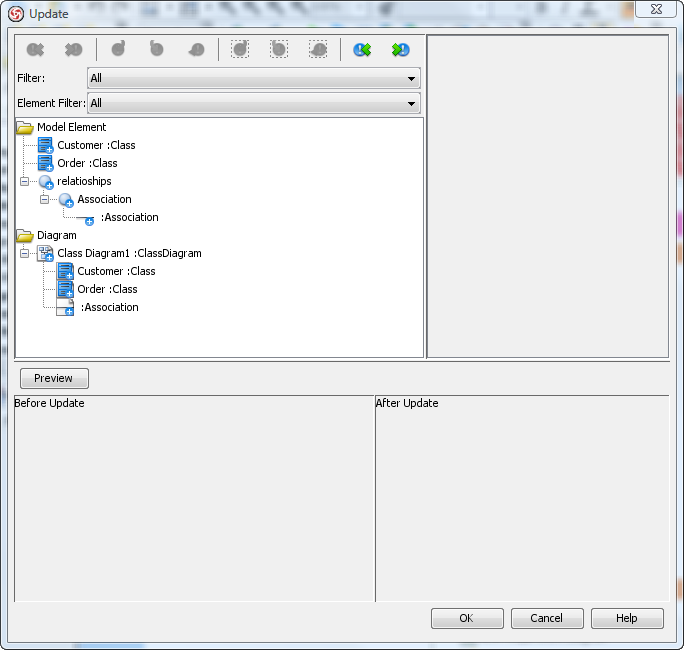
Review changes when update


Leave a Reply
Want to join the discussion?Feel free to contribute!