

How to Perform Code Engineering with VP-UML and Eclipse on Mac OS X
A great software design lead to a great piece of software product. With the help of VP-UML, Mac users can design software system on their Mac easily. What’s more, VP-UML’s supports both code generation and reverse engineering, which aid in the seamless transition between software design and source code. Its Hibernate support also makes database application development much easier by producing the object layer (both library and code) essential in building a database application in an object-oriented fashion. In this article, we will demonstrate the various ways of source code generation with VP-UML. Eclipse IDE will be used at the parts that involve coding.
Instant Code Visualization with Instant Reverse
There are many reasons you might want to produce a UML class diagram from your source code. First, you might want to understand the code easier by studying a diagram instead of a full page of text. You might also want to to discuss your code with your colleague in a more effective way. Sometimes, you are asked to write a design specification that requires showing the software design ideas instead of the actual source code.
Whenever you want to visualize your source code with UML class diagram, the Instant Reverse feature can help. Instant Reverse was designed to be a one-off reverse engineering tool that helps you reverse engineer class diagram from an instant of source code, like taking a snap-shot for the code. Throughout the entire software development cycle, you may need to keep recording your software design time after time. Every time you need to produce a software design, run Instant Reverse.
Note that every time you reverse engineer class diagram with Instant Reverse, the previously created models will be overwritten. In other words, if you make change to the UML classes and run Instant Reverse again, you will lost your changes.
To run Instant Reverse:
- Select Tools > Code Engineering > Instant Reverse > Java… from the main menu.
- In the Instant Reverse window, click on Add Source Folder… .
- In the Select Directories window, select the source folder of your Eclipse project. Note that you are required to select the source folder instead of the root folder of your Java project, which means, if you place your source code inside the src folder, you should select the src folder here, rather than the project root.
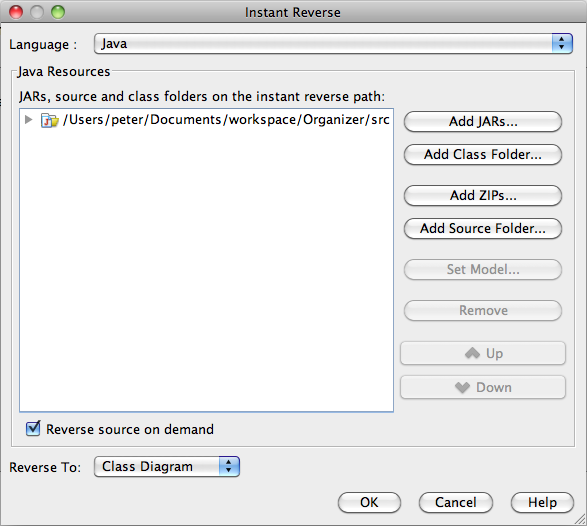
The Instant Reverse window
- At the bottom left corner of the Instant Reverse window there is an option called Reverse source on demand, which is used to determine whether or not you want VP-UML to analyze and create UML classes from all the Java classes immediately when you continue from this screen.
No doubt the time required to analyze and create UML classes depends on the classes required to process. The more classes to process, the longer time required. If you have a large code base and you do not have the immediate need to visualize all of the classes, we recommend you keep Reverse source on demand checked. When the option is checked, VP-UML will just build an index tree for the selected sources WITHOUT analyzing the code content of any class. Anytime when you need to visualize a class, press on a class (node) in the index tree and drag it into a class diagram. VP-UML will then perform the actual reverse engineering process for the selected classes. - Click OK.
- If you have unchecked Reverse source on demand, you are prompted to form a diagram.
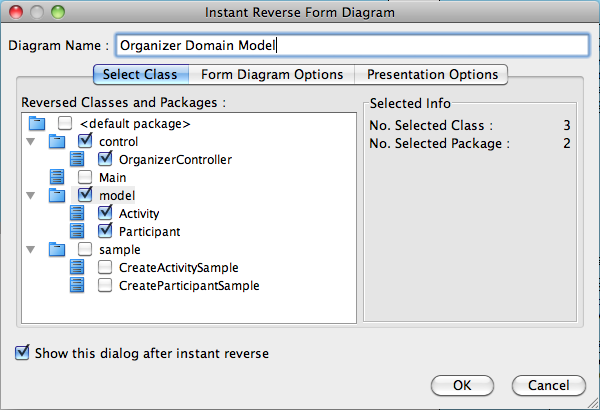
Form a class diagram
Select the packages and classes to form a diagram.By clicking OK, a new diagram is produced.
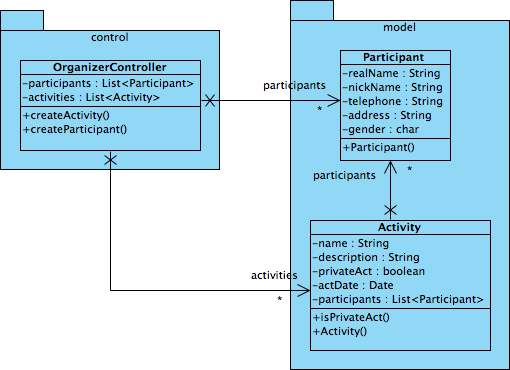
Class diagram formed
- If you have checked Reverse source on demand, you won’t be prompted to form a diagram. Instead, you may form diagram manually by opening the Class Repository, selecting the classes you want to show in a class diagram and drag them onto the diagram.
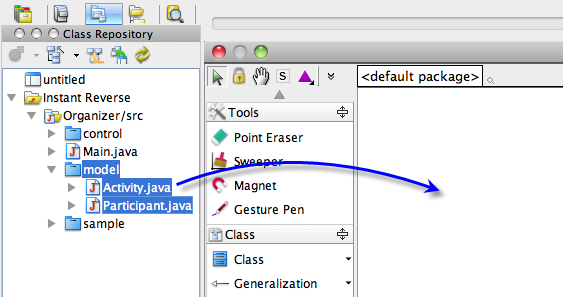
Form a class diagram manually
Instant Code Generation with Instant Generator
While Instant Reverse enables you to produce UML class diagram from Java source code, the Instant Generator feature works in the opposite way by enabling you to generate the Java code from a UML class model. Similar to Instant Reverse, every time you generate code with Instant Generator, the previously generated files will be overwritten completely. In other words, if you make change to the code content and run Instant Generator again, you will lost your changes.
Let’s say you have designed an online bookstore with UML class diagram, like this:
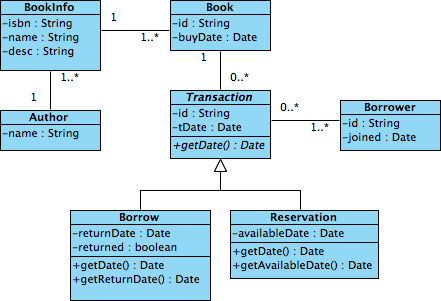
Sample class diagram
To generate Java code:
- Select Tools > Code Engineering > Instant Generator > Java… from the main menu.
- In the Instant Generator window, specify the output path, which is the folder where the code will be generated to. Here you need to select the source folder of you Java project in Eclipse. Same as Instant Generator, do remember to select the source folder, not the project root folder.
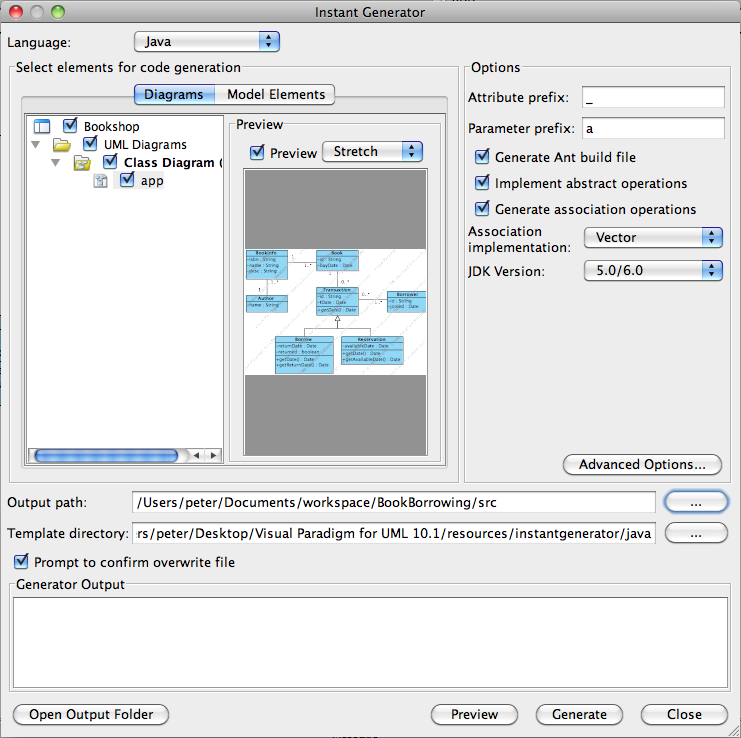
Generate an instant of code
- Select the diagram to generate code. Packages and classes in the diagrams will be generated to code.
- Instead of select diagrams, as an alternative, you can select directly the classes to generate code, under the Model Elements tab.
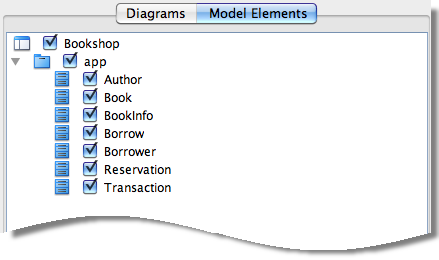
Select classes to generate code
- Click Generate.
- Refresh your Java project in Eclipse. You can see the classes produced.
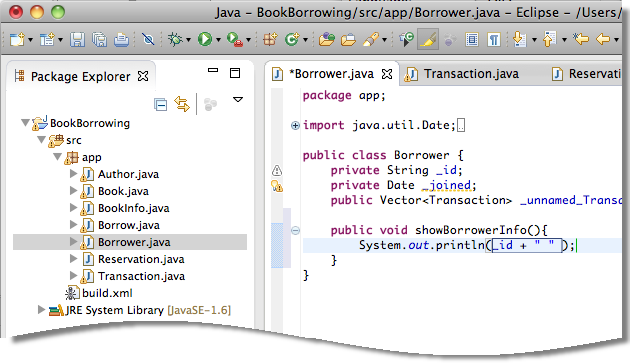
Source code in Eclipse
Round-trip Engineering
While Instant Generator and Instant Reverse, as described in the previous sections, allow you to produce an software design or source code from an instant of code or UML model, the round-trip engineering features allow you to produce and keep the software design and source code synchronized.
Round-trip engineering allows you to generate and update source code from UML model as well as from UML model to source code. Unlike Instant Generator and Instant Reverse, round-trip engineering takes the “merge” approach instead of overwriting changes you make.
To produce/update source code from UML model:
- Select Tools > Code Engineering > Java Round-trip > Generate Code… from the main menu.
- In the Generate Code window, double click on the source path to specify the source folder of your Java project in Eclipse.
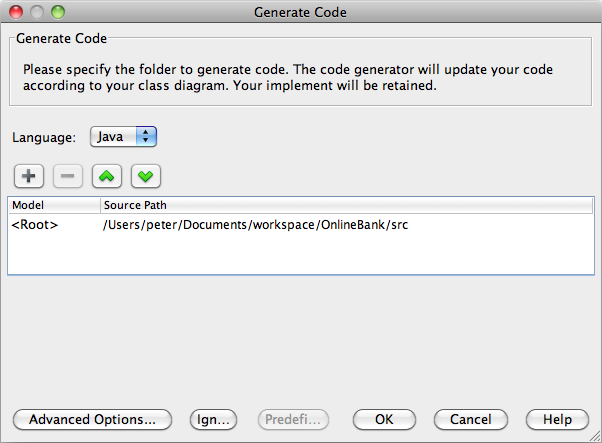
Round-trip code generation
- Click OK.
To produce/update UML model from source code:
- Select Tools > Code Engineering > Java Round-trip > Reverse Code… from the main menu.
- In the Reverse Code window, double click on the source path to specify the source folder of your Java project in Eclipse.
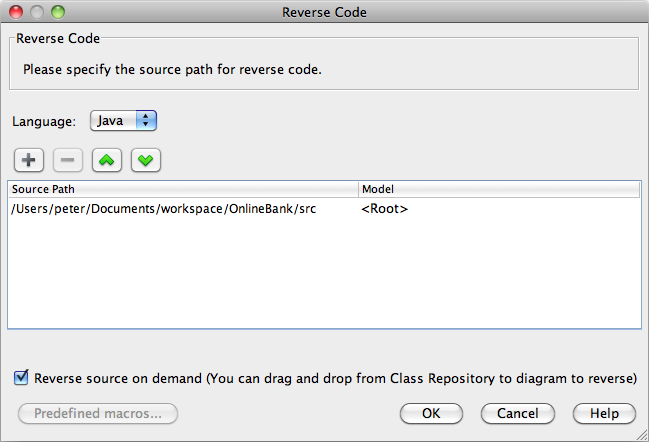
Round-trip reverse engineering
- Click OK.
Hibernate Oriented Relational Mapping (ORM)
Writing SQL statements is not easy. As an advocate of object oriented software development, Visual Paradigm suggests to develop database application in an entirely object oriented approach – no more SQL. To generate the ORM persistence layer for developers to use as an API for interacting with database, perform the steps below:
- Select Tools > Hibernate > Generate Code… from the main menu.
- In the Database Code Generation window, specify the Output Path, which is the project root folder of your Java project in Eclipse. Please pay special attention here. Unlike Instant Generator, Instant Reverse and round-trip, here you have to fill in the root folder of your Java project here. This is because the generator will generate not just the source files, but also the libraries and configuration files essential in compiling and executing the code. These files will be generated to different sub-directories under the project folder.
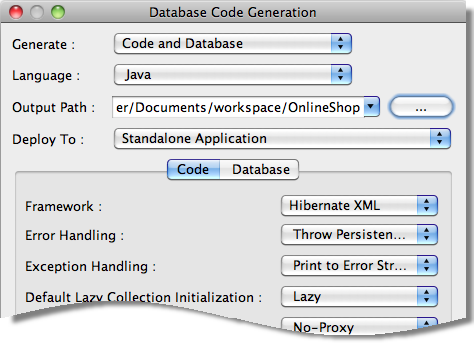
Generate Hibernate
- Click OK.
- Refresh the Java project in Eclipse. You may see a lot of compilation errors. Don’t worry, just add lib/orm.jar into build path, the errors will then be resolved.
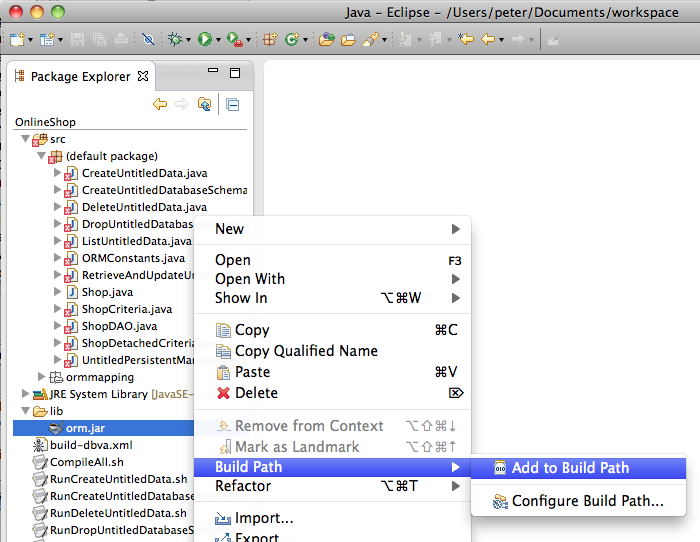
Add orm.jar into build path
Leave a Reply
Want to join the discussion?Feel free to contribute!