How to upgrade VP Server (Prior to version 5.3)
With the latest release of VP Server 5.3, you might choose to upgrade from your existing server. To migrate properly, one must follow specific procedures to carry over vital information such as the current repository and user accounts to the new server.
This tutorial will walk you through how to do just that.
We will be using the following example for better illustration:
Old (Existing) server installed at C:\VPServer 5.2
New server installed at C:\VPServer 5.3
Steps to Migrate
- Shut down the existing VP Server.
- Back up the entire existing server.
- Unzip the new server package to a location you select ( e.g. C:\VPServer 5.3 ).
- Open a terminal window or a command prompt.
- Change your current directory to C:\VPServer 5.3\scripts
- Run the script migrate.bat with the parameter -path specifying where the old (existing) server was installed.
For example, execute the command migrate –path “C:\VPServer 5.2” - Once the script proceeds to run, the existing server will be disabled. The repository, user accounts and license key will be exported in this process. So for “safety” reason, enter the calculation result to confirm running the script.
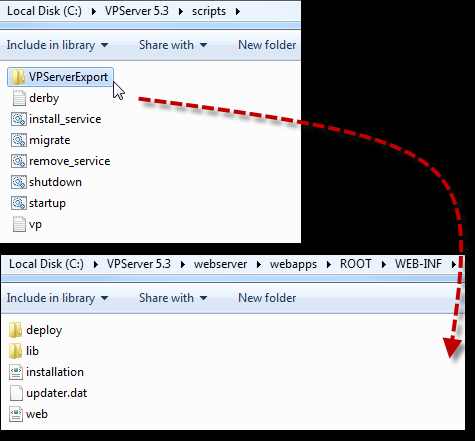
- A zip file called vpserver.tar.gz is automatically created in folder VPServerExport which contains the exported information from above.
- Move folder VPServerExport to under the WEB-INF folder.
- Start up the new server.
- Access the new server in a web browser to begin the installation (e.g. http://localhost:1999).
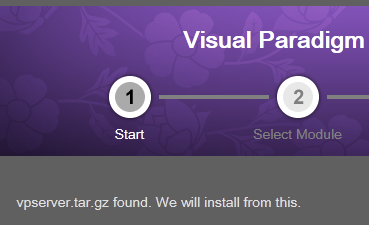
- Once the exported file is successfully detected, you should see the screen below. Click Next.
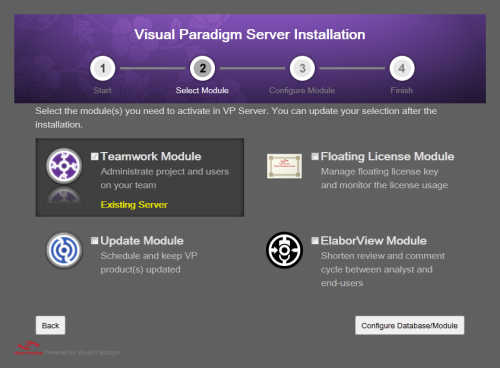
- Your modules will be automatically detected and selected for installation in this screen.
Modify the default module selection, if needed. Click Configure Database/Module.
Follow remaining onscreen instructions to complete the installation.
Import from Teamwork Server 4.1 or Earlier
If you come from Teamwork Server version 4.1 or earlier, there will be some slight differences in the onscreen instructions which we are going to highlight here.
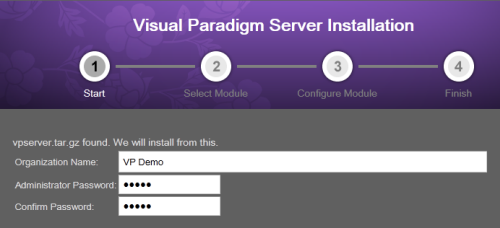
- In the beginning, you will be asked to enter your organization name and admin’s login info. Click Select Module to continue.
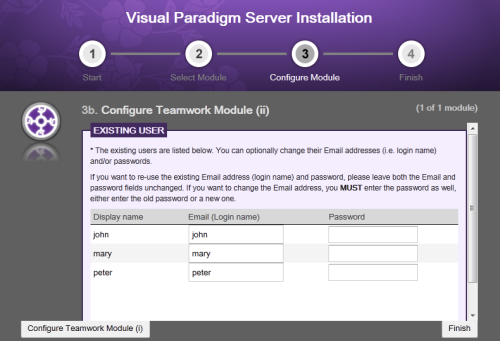
- In the Configure Module screen, the existing user accounts imported will be displayed. You can choose to:
- Reuse the login names and passwords imported. Don’t make any changes to the fields and click Finished.
- Change the login name. Either re-enter the same password or enter a new password. Click Finished.



Leave a Reply
Want to join the discussion?Feel free to contribute!