

Migrate Projects from CVS, Subversion, Perforce and ClearCase into Teamwork Server
 Visual Paradigm‘s Teamwork Server is designed specifically for perform team collaboration development with Visual Paradigm modeling client. It capable in doing everything you can do with CVS, Subversion, Perforce and ClearCase, plus some exclusive features like task management, online design sharing and comments sharing. You can migrate your teamwork projects from CVS, Subversion, Perforce and ClearCase into Visual Paradigm’s Teamwork Server, including all the revisions and modification histories, and this article will show you how to do the migration.
Before you start
There are 3 things you need to do before starting the migration service.
- Make sure your client and server are updated to version 10.1 build 20130202 or above. You can reference to the following article at the bottom of the page on updating the client and server.
- Commit all your modifications to server. Since the revisions number of the project will be changed after migration, you will not able to commit the un-committed modification once the migration is done.
- Merge all the branches back to trunk. We will only migrate the trunk into Teamwork Server. All the branches will be dropped.
Exporting projects from your version control server
You first need to export your projects from your version control server in order to migrate them into Teamwork Server. To export the projects in version control server:
- Select Team > Login and login to your version control server.
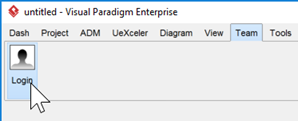
Login to your existing version control server
- Select Team > Utilities > Open Teamwork Client to open the Teamwork Client dialog.
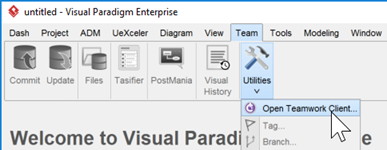
Open Teamwork Client
- Select your teamwork project from the list and switch to Revisions tab.
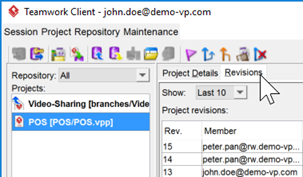
Select your project and switch to Revisions tab
- Press Export > Export all revisions from repository… below the revision list.
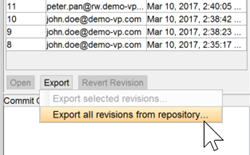
Export all revisions from your existing version control server
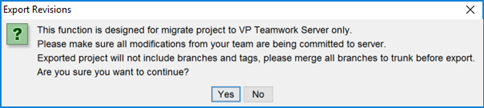
- You will be prompted that we will only export the trunk projects. So if you have branches for your project you will need to merge it back to trunk before doing export. You can reference to the user’s guide section on how to merge your branches back to trunk. Press Yes to confirm the export.
Export revisions will only include the trunk projects
- Specify the location to store the exported file(s). The project and its modification history will be packed into zip file. If the entire project and modification histories are really large, it will then automatically split into multiple zip files.
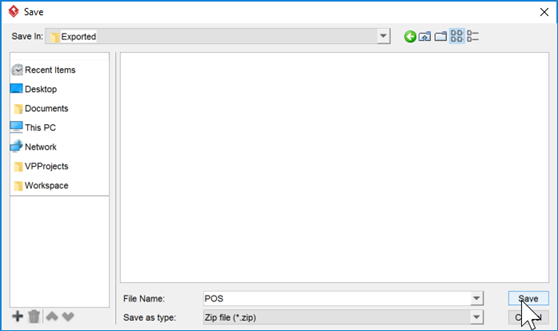
Exported revisions will pack into a zip file
Upload exported package to Teamwork Server
After you have exported the projects from your version control server, you can then import it into Teamwork Server.
- Open the browser and login to your VP Server as Admin user, or a user with create project permission.
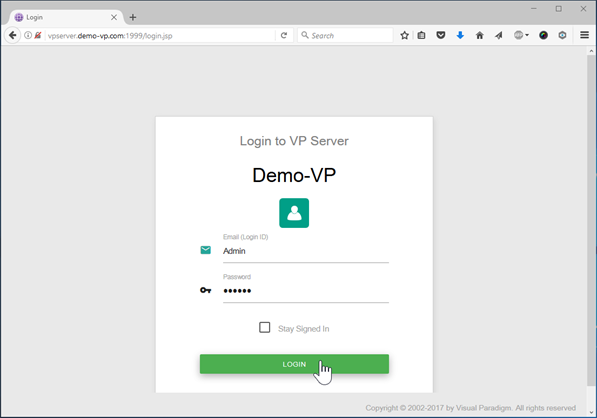
Login to VP Server as Admin user or a user with create project permission
- Select Projects under Management.

Select Projects under Management
- Press the Import Project with Revisions button under Projects Management.

Press Import Project with Revisions
- Upload the exported zip file to Teamwork Server. If the projects are exported as multiple zip files, then please upload all exported zip files.
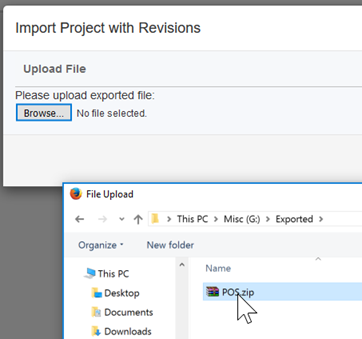
Upload the exported project to server
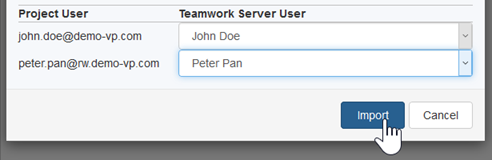
- Once the upload is done you will be prompted to map the project user according to the commit histories. Since the users doing commit in your version server may not available in Teamwork Server, by default user with same name on Teamwork Server will be mapped automatically. And you can use the combo box to specify the user from your Teamwork Server.
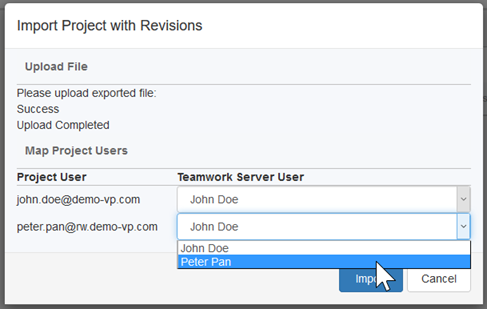
Map the appear on revision history of the project with user on current server
- Finally press the Import button to proceed.
Start import of project
- You will able to see the project and the revision histories once the import process completed.
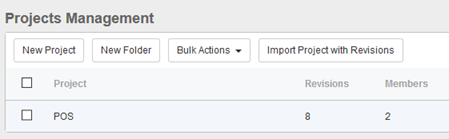
Project with revision history being imported to VP Server
- Please note that the revision number of the imported project will not be the same as in your version control server. The revision number of the imported revisions will be starting form 1.
Continue your development
You will have to check-out the project again to continue your development. To re-checkout the project:
- Logout to your existing Teamwork Client.
Logout Teamwork Client
- Login again but this time change to VP Teamwork Server.

Select VP Teamwork Server to login again
- Enter the host and port of your Teamwork Server.
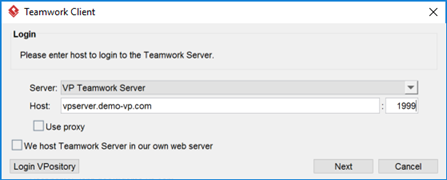
Specify the host and port of your Teamwork Server
- Fill in the login information and press Login to proceed.
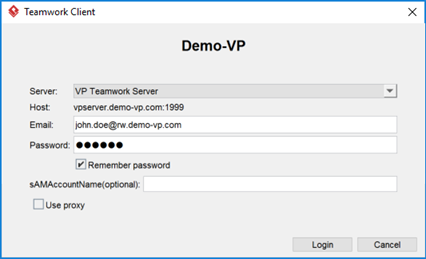
Enter login information
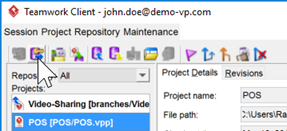
- Open Teamwork Client once you logged in, then press the Manage Project button.
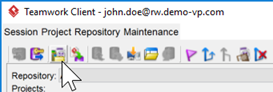
Select Manage Project
- Add the project from Repositories list to Projects list.
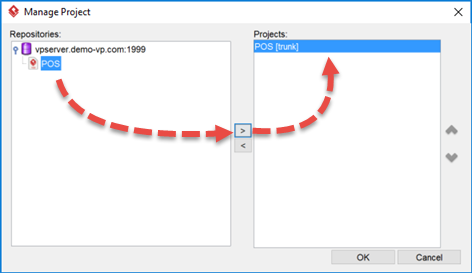
Select the project from Teamwork Server repository
- Press the Checkout button. And now you are ready to perform teamwork operation on Teamwork Server.
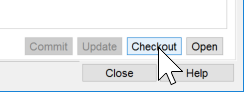
Checkout project from server
Related Know-how |
Related Link |
Leave a Reply
Want to join the discussion?Feel free to contribute!