

Understand the Change Request Process
Visual Paradigm version 17.2 introduced a change request approval process for users to make change to their models in a more systematic and governed manner. In this article you will learn how this process works.
Assign Change Approver to your project
The first thing we need to do is to assign approver to your project.
- Login to Teamwork Server/VP Online using web browser as a user got Update Project permission.
- If you are reaching the dashboard area then press on your name at the top right and select Administration from popup menu.
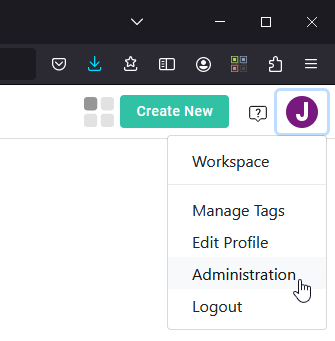
Visit to administration panel
- Select Projects, then mouse over the target project and select Edit.
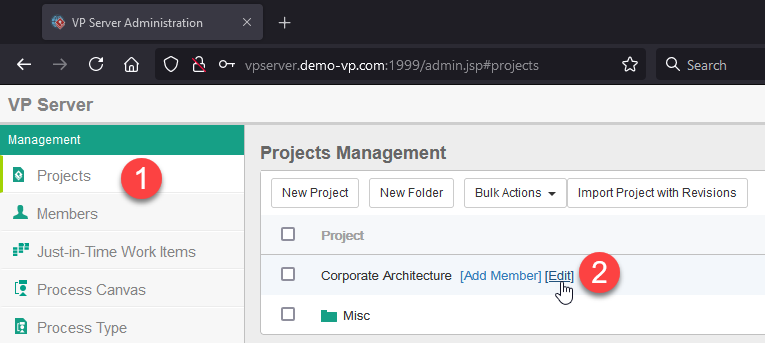
Edit your project
- Switch Members, then mouse over the member and select Advanced Permission.
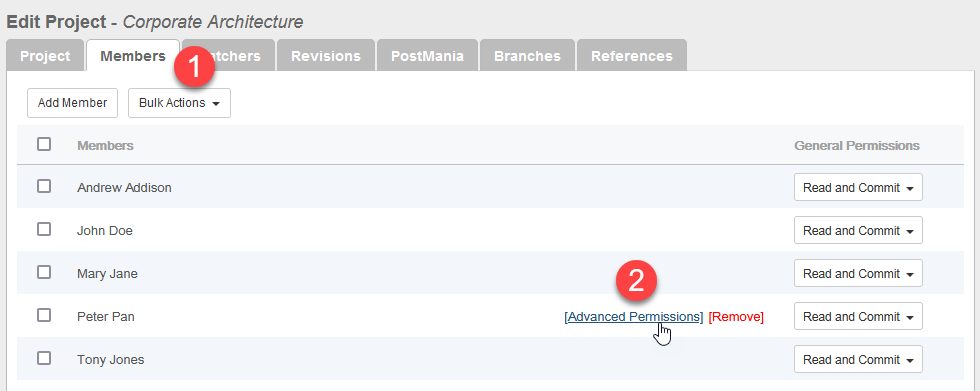
Edit Advanced Permission of a member
- Enable the Approver Press Close button to close the dialog.
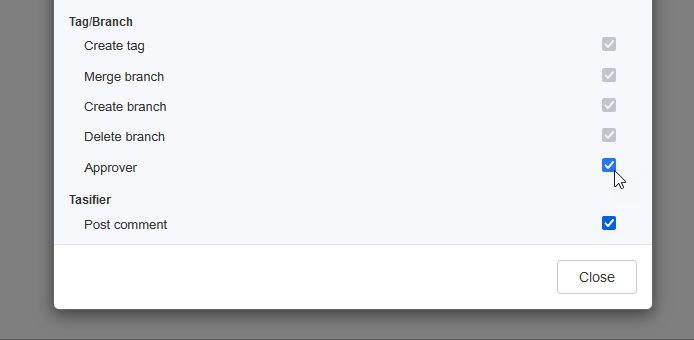
Enable approver role of the member on this project
- Press Save button at the top right to save the change.
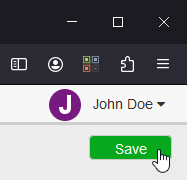
Save the change
After that the member will pickup change approver role on that project.
Create Change Request
Change request process will available to a project once approver being assigned.
- Go to Team > Utilities > Create Change Request.
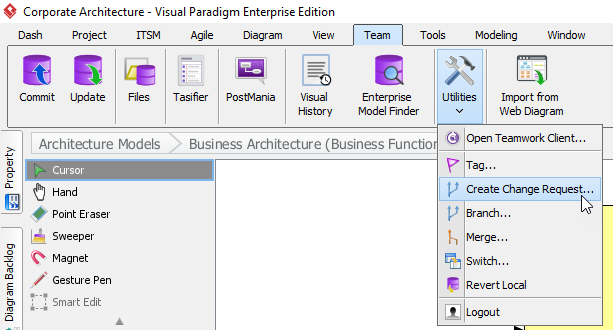
Create Change Request
- Enter the name of the change request, and optionally you can enter the rationale of the change. After that press Create button to create the change request.
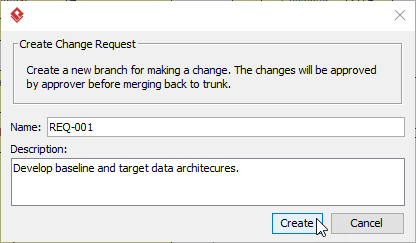
Specify details about the change request
- Visual Paradigm will prompt you to switch to the change request. Select Yes to switch over and start work on the change request, or select No to continue work on your current trunk/branch.
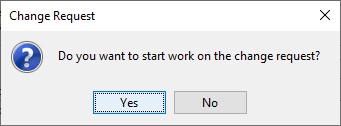
Decide to start work in change request, or keep working in current trunk/branch
Send Merge Request
Once the modification is done, press the Commit and Send Merge Request button to commit the changes to repository. The repository will then send out an email to approver to let him/her know the work on that change request is done. Developers now request to merge the changes into trunk so it’s time to have a review on the works.
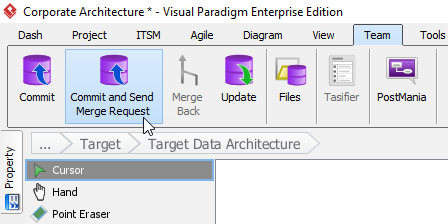
Send merge request to approver when modification is done
Process Merge Request
Once the approver received merge request email from repository he/she can then click the link in email to open the Change Request section in your repository’s PostMania portal.
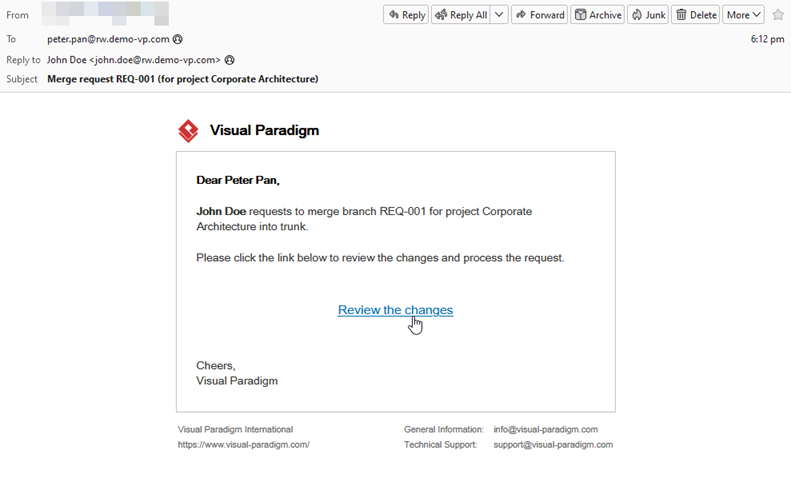
Click the link in merge request email to review the changes
The page will list out the revisions and change details being made within the change request.
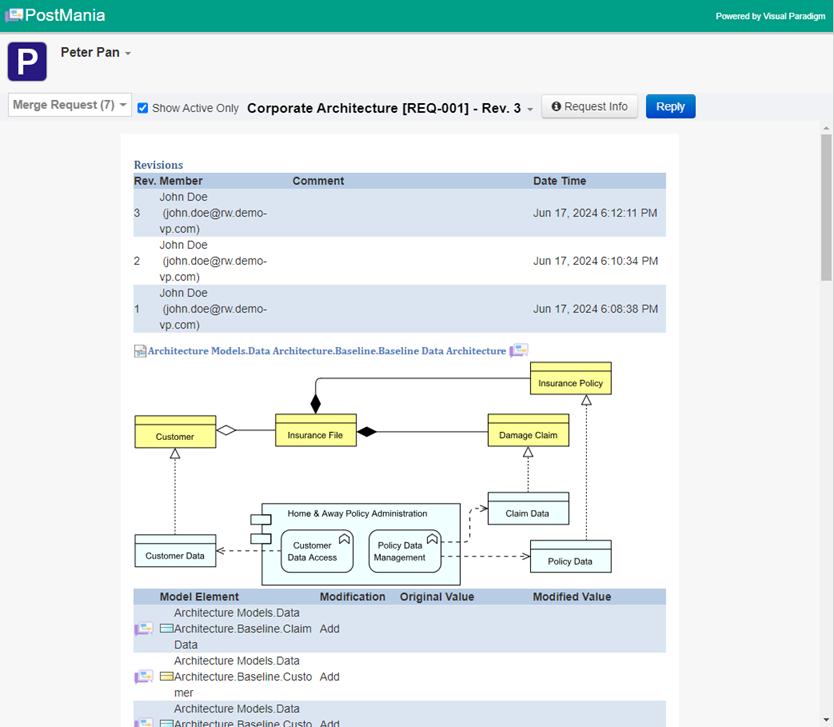
Details about the changes are listed in the page
Approver can review the list about the modifications being done, and click on the PostMania icon next to change entry to open it up for making comment. Developers will immediately receive notification from their Visual Paradigm desktop application.

Approver can leave comment on diagram or specific model elements for developers
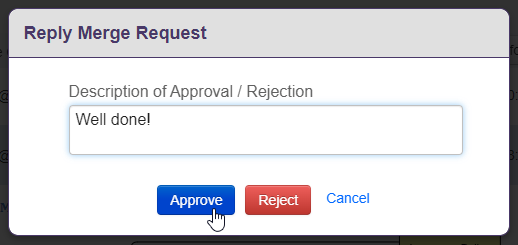
Once the review is done approver can then press the Reply button at the top to approve or reject the changes.

Reply to the merge request
You can also write a comment when reply to back to developer about the decision. Developers will receive email notification about the approval or rejection of the merge request.
Send reply message alone with the approval or rejection
If the merge request is being rejected then developer should modify the model according to the comment from approver and re-submit the merge request.
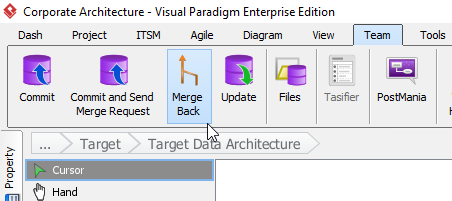
Merge the changes back
Once the merge request being approved developers will receive email notification on it. By that time developers can rollout the changes by reopen the project and go to Team > Merge Back to merge the changes back to the trunk/branch.
Merge the changes back to trunk/branch
* Please note that the creation of Change Request and send out of Merge Require require Professional Edition or above.
Leave a Reply
Want to join the discussion?Feel free to contribute!