

Advanced Printing Features of Logizian
Along with the basic printing setup, Logizian enables you to perform various additional functions in order to print the size of your diagram at its best. This article is mainly concerned with adjusting page margin, printing with multiple page mode and printing with clip marks.

The overview of advance printing page
After you open a Logizian project, select File > Print… from the main menu to explore the advanced printing page.

Click Print… from the main menu
In the Print window, select the diagram(s) for printing on the left-hand side of the screen.
Assume you want to print an extremely large diagram as shown below:

A large diagram
If you want each page of diagram to be printed at most and want to regulate the page margin, do as the following steps:
- Click Adjust Margins button on the toolbar.

Click Adjust Margins button
- In the Adjust Margins page, you are allowed to adjust the page margin. Press the selector of specific margin location to adjust the margin. For example, you can extend the right margin by pressing the downside selector. Note that the smaller the number in margin box, the closer the margin indicator to the the edge of page. Moreover, you can switch the measure unit to cm through the drop-down menu on the top-left corner.

Adjust the right margin of page
For a better print layout, you can define the number of pages of your diagram on a page.
- Click Multiple Page Mode button on the toolbar.
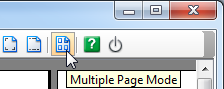
Click Multiple Page Mode button
- Click multiple page icon and select two rows with four column by moving the mouse over the rows and columns.

Select rows and columns
- As a result, the diagram will be arranged in two rows with four columns shown on the preview window and it will fit the multiple page setting for printing.

Multiple page setting is shown
The application of clip marks helps you to save your time for printing trim and prevent from mistakenly cutting.
- Click Show Clip Marks on Page button on the toolbar.

Click Show Clip Marks on Page button
- The diagram will be shown with clip marks instantly. Once you print it out, you can trim and cut it with facility.

Diagram with clip marks
Leave a Reply
Want to join the discussion?Feel free to contribute!