Setup VP Teamwork Server on Secure Connection with Self-Signed Certificate
SSL, short for Secure Sockets Layer, is a protocol for enforcing secure communication via the network. For Visual Paradigm Teamwork Server users, it is possible to setup such a communication between the client and server to protect their works. In this article, we will go through the steps for preparing a certificate that is expected to be known by those users involved, configuration of VP Teamwork Server, and the setup of clients.
The following software will be used throughout this article.
- JDK 1.6
- Visual Paradigm Teamwork Server
- Visual Paradigm for UML (note: SSL can be established for other VP client products such as Logizian and AG)
Preparing self-signed certificate
keytool is a key and certificate management utility. You can run it to generate a signed certificate.
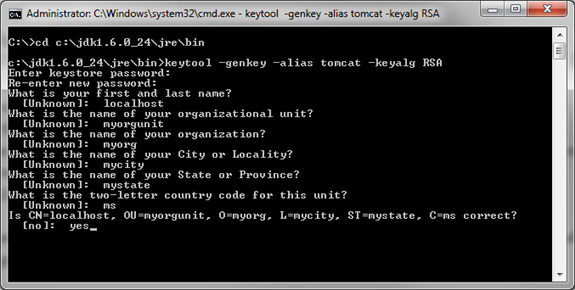
- Run the keytool command under the bin folder of JRE:For Windows: %JAVA_HOME%\bin\keytool -genkey -alias tomcat -keyalg RSAFor Linux: $JAVA_HOME/bin/keytool -genkey -alias tomcat -keyalg RSA
- Enter a password for the keystore and press Enter.
- Enter the first and last name and press Enter. This will become a part of the https URL.
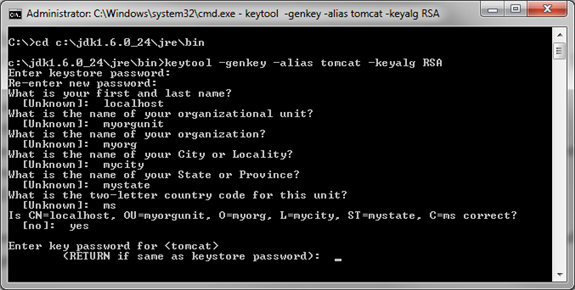
- Answer the other questions one by one. Finally, confirm the entered information by entering yes and pressing Enter.
- Press Enter when being asked for a password for <tomcat>
This generates a .keystore file at the user home folder. For example, C:\Documents and settings\user\.keystore
Setting up VP Teamwork Server
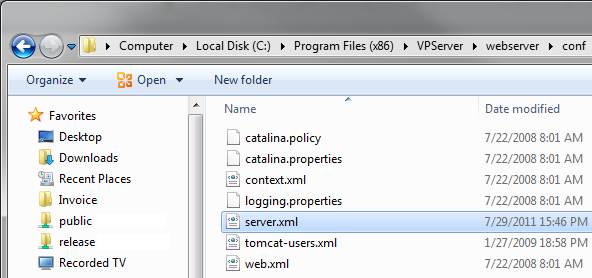
- Open %VP_SERVER_HOME%\webserver\conf\server.xml
- Add the following code to the file, under the <Service name=”Catalina”> element.
<Connectorport=”443″ minSpareThreads=”5″ maxSpareThreads=”75″ enableLookups=”true” disableUploadTimeout=”true”acceptCount=”100″ maxThreads=”200″ scheme=”https” secure=”true” SSLEnabled=”true”keystoreFile=”%path_to_your_keystore_file%” keystorePass=”%your_pass%” clientAuth=”false” sslProtocol=”TLS” protocol=”org.apache.coyote.http11.Http11NioProtocol”/> Replace keystoreFile‘s value with they .keystore file path, which is at the user home folder.
Replace keystorePass‘s value with the password supplied when generating the .keystore file. (Refer to step 2 of the above section)
Editing the Host file
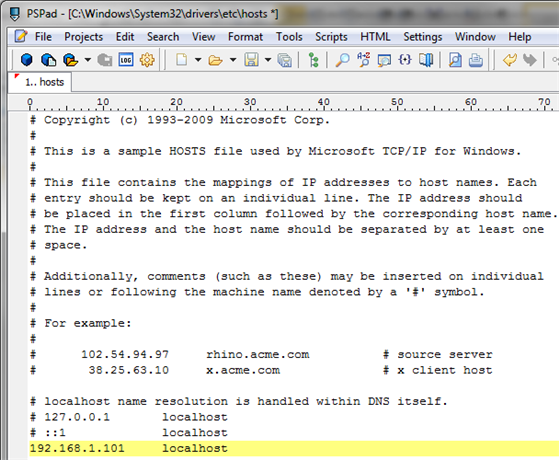
Since the certificate is bound to specific host, machines that need to connect to the server may need to configure the host file to define the mapping of IP/host and name.
For Windows:
- open “C:\Windows\System32\drivers\etc\host” with text editor
- add a line %server_ip% %your host defined in .keystore%
For Linux
- open “/etc/hosts”
- add a line %server_ip% %your host defined in .keystore%
Install VP Teamwork Server
If you need to perform server administration such as adding users and projects, follow the steps below.
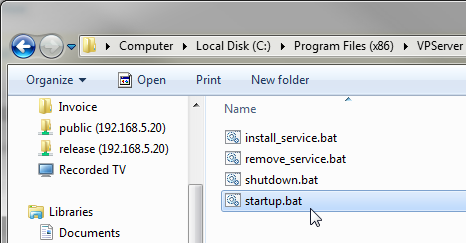
- Start up VP Server by executing %VP_SERVER_HOME%\scripts\bin\startup.bat
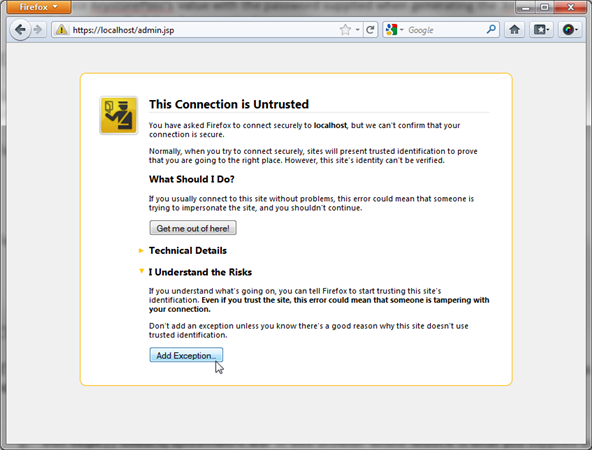
- Visit https://%host%/ in web browser where %host%is what you supplied as the first and last name when generating the keystore file. (Refer to step 3 of the first section)
If you received a notification of the website being certified by an unknown authority (since the certificate is self-signed), select to accept it and proceed.
- This enters the server administration page. Configure the server by walking through the on-screen instructions.
Running VP Teamwork Client
Teamwork client users should obtain the .keystore file from the administrator in order to connect to the teamwork server via SSL. During SSL communication, the certificate is presented and need to be validated from server. Since the certificate is self-signed, it is not possible to be validated automatically. We need to add the certificate to the trusted keystore in order to make it work. To do this:
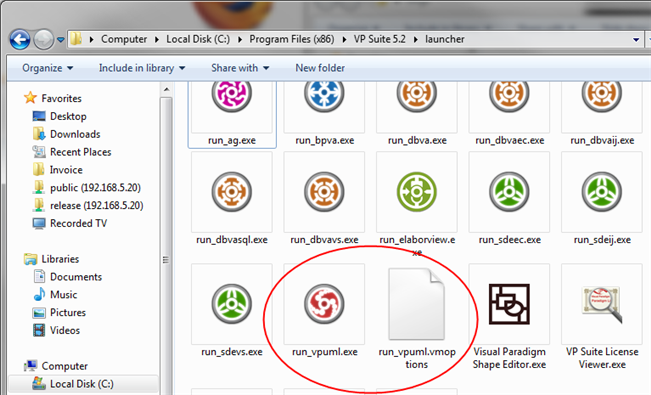
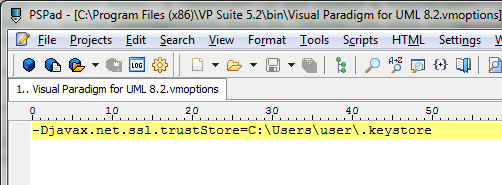
- Create run_vpuml.vmoptions file inside VP Suite/launcher folder
For other standalone product, change the file name of vmoptions to the product you are using
- Enter -Djavax.net.ssl.trustStore=%path_to_your_keystore% in vmoptions file. Note that it is NOT required to quote the path. Quoting the path may lead to unable to connect to server.
- Run VP Suite/launcher/run_vpuml.exe to start the product.
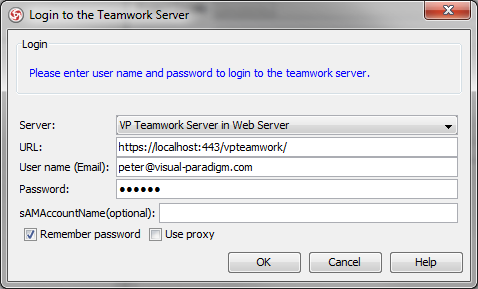
- Login to the Teamwork Server. Make sure https:// and port 443 is used in the URL in order to connect to server over SSL.





Leave a Reply
Want to join the discussion?Feel free to contribute!