

Create read-only user to your VP Online workspace (VP Desktop User)
Visual Paradigm Project Viewer (VP Viewer) is a free application which allow user to browse the content of your projects without the need of purchase any license key. For large organization you can setup viewer users in your repository so that they can browser your projects without afraid that they will get modified. In this article we will show you how to create viewer users in your VP Online workspace and how the viewer users can access to your projects.
On your VP Online workspace
- Visit VP Online webpage, press Login button at the top right corner of the page and login your workspace as a user who got Create Member and Update Project permission.
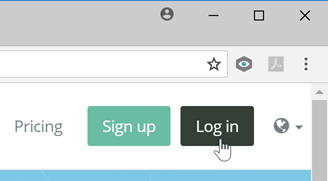
Visual VP Online and press Log in button
- Once you logged in, click on your name at the top right corner of the page and select Administration from popup menu.
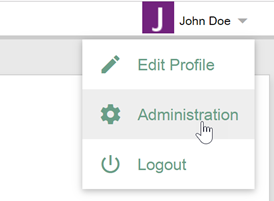
Administrate VP Online
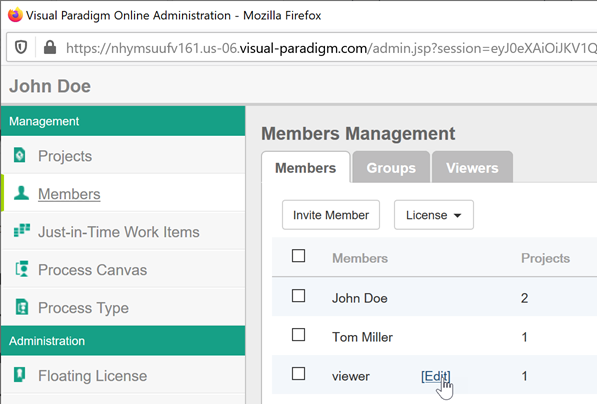
- Select Members on the left and press Invite Member button.
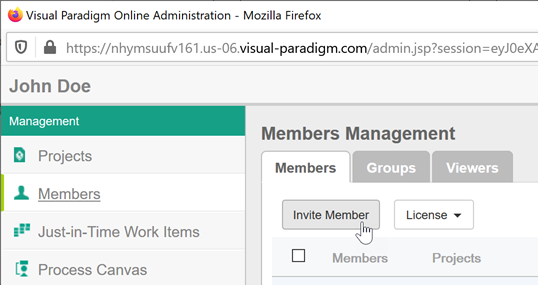
Press Invite Member button
- Enter the Name and Email Address of the viewer user. Press Send Invitation button to send out the invitation. You can invite multiple members at once.

Enter name & email address of the user you would like to invite to join in
- Select Projects on the left, mouse over the project you would like to grant access to viewer user and press Edit button.
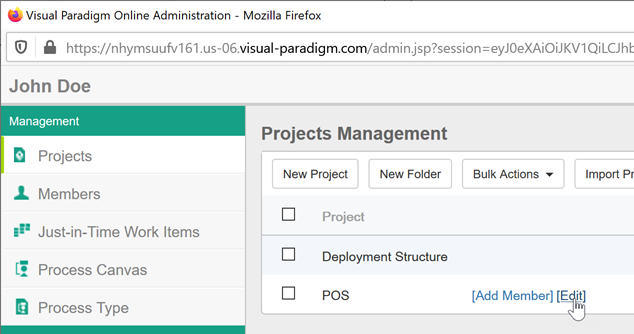
Edit project you would like to grant access to viewer user
- Switch to Members tab and press Add Member button.
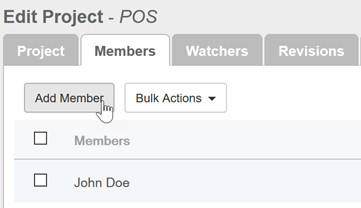
Add member to project
- Press the + button next to viewer user to grant him access to this project. Press Close button when done.
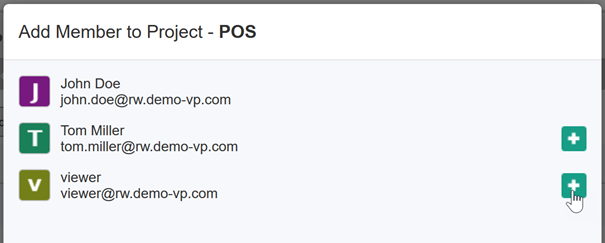
Assign viewer user to project
- Switch the General Permissions to Read Only.
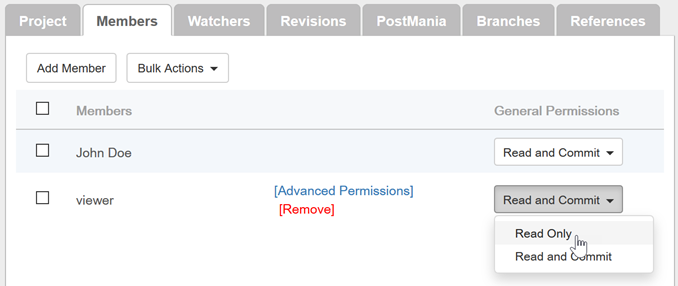
Set the proejcts to read only permissions for viewer user
- Press Save button at the top right to confirm the change.
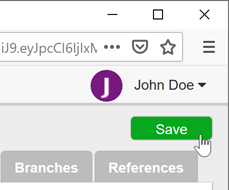
Save the changes
For viewer users
- Open the link in activation email with web browser.
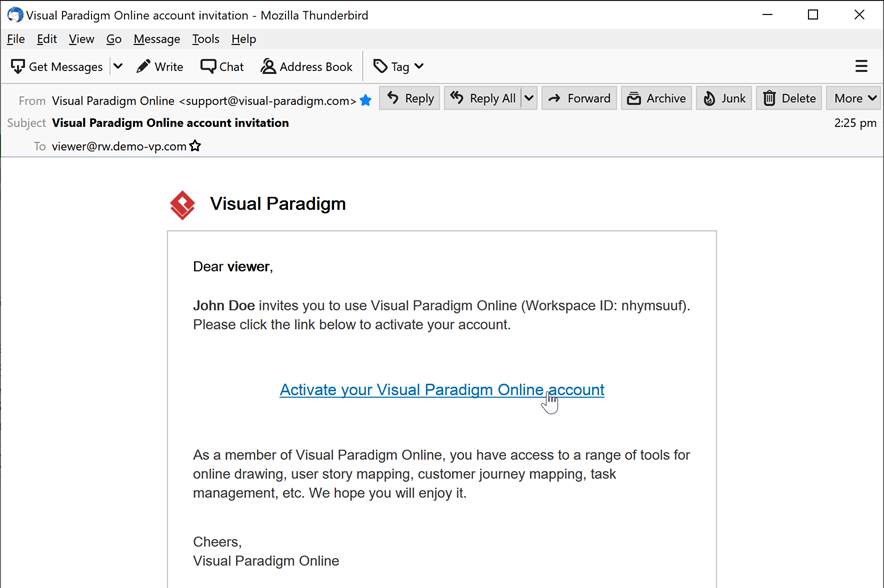
Open the link in activation email
- Specify your password in activation page.
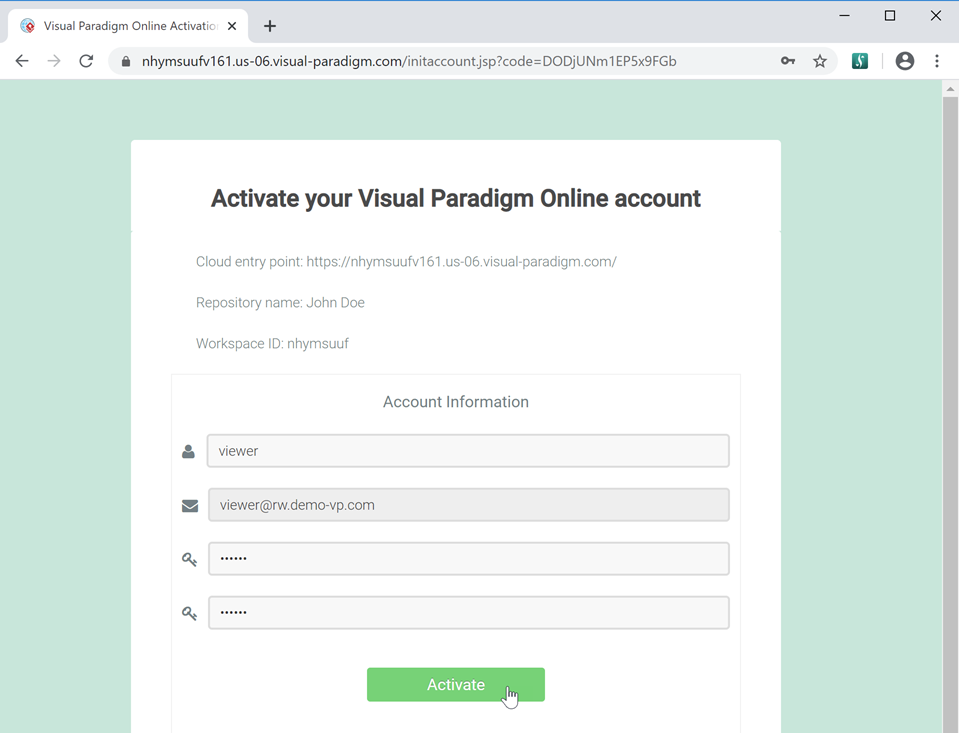
Specify your password
- Visit Visual Paradigm’s download page to download the Free Project Viewer.
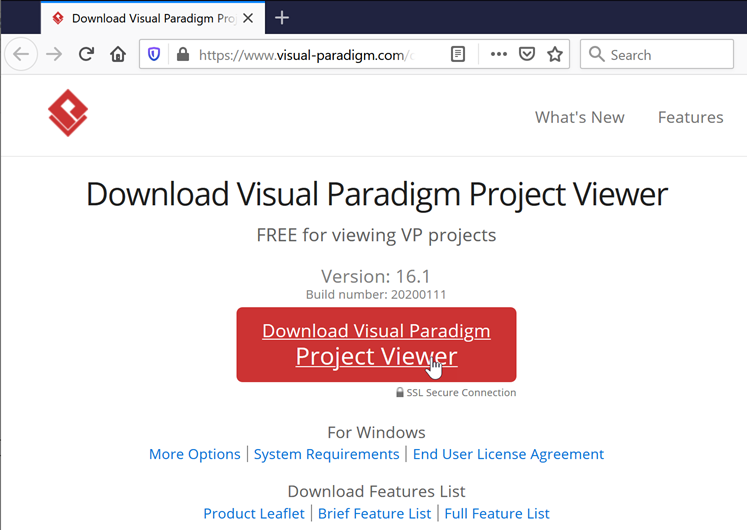
Download Visual Paradigm Project Viewer
- Unzip the downloaded viewer package and execute the Visual Paradigm Project Viewer executable.
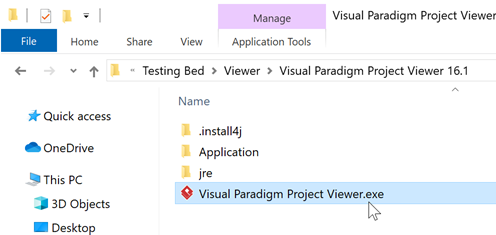
Launch Visual Paradigm Project Viewer
- Select Team > Login.
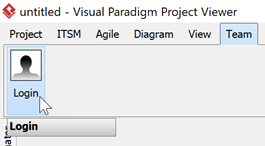
Select Team > Login menu
- Enter your workspace where you can found in the account activation email.
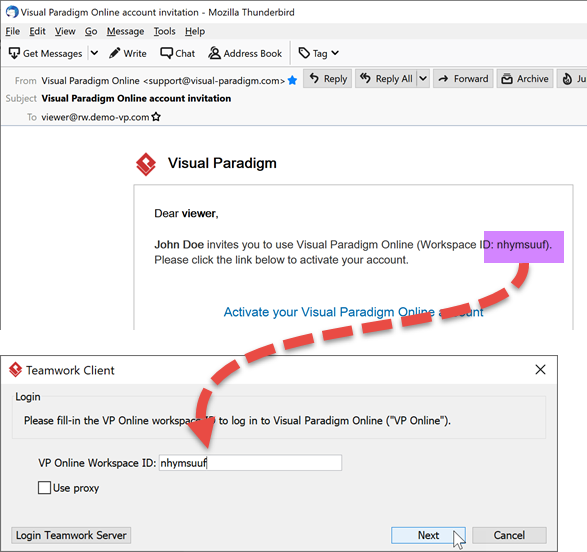
Enter workspace ID
- Enter your login ID and password to login.
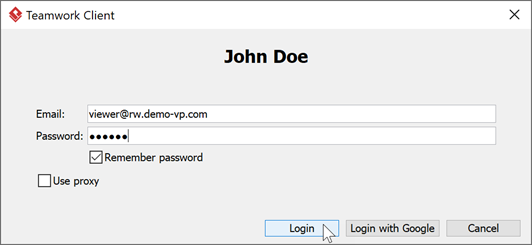
Enter login info
- After that a dialog will show and allow you to open the projects which you granted access.
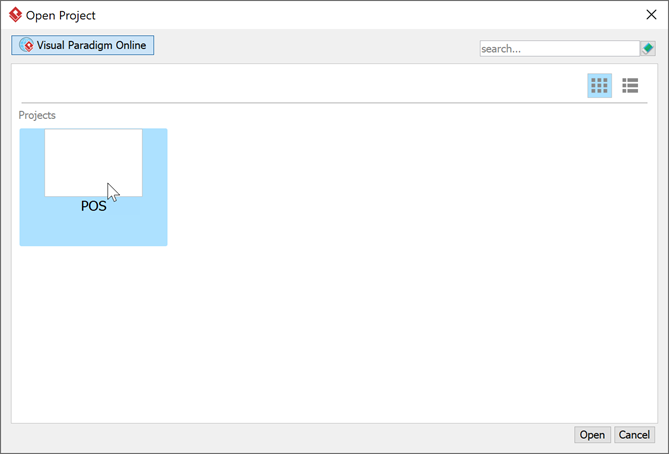
Open project which you granted access
- You can also go to Project > Open > VP Teamwork Server to open the projects you granted access.

Open projects from Project > Open menu
After viewer activated
It is recommend to turn off all permissions for viewer user after he activated the account. To turn off the permissions you can go to the Members page in Administration portal and and press the Edit button next to the viewer user.
Edit viewer user
After that switch to Permissions tab to turn off his permissions, and press Save button at top right to save the change.
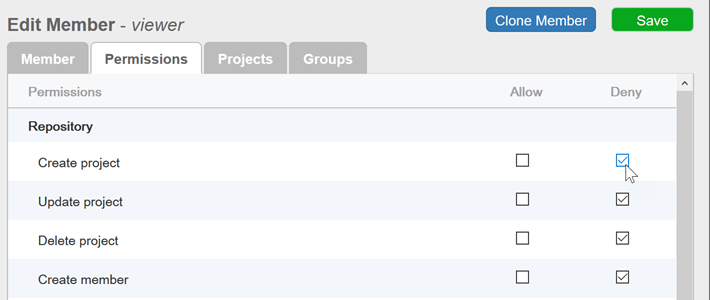
Turn off viewers permission
Leave a Reply
Want to join the discussion?Feel free to contribute!