How to Backup VP Server Repository
 VP Server is a server application which included the Teamwork Server, Floating License Server and Update Server. To protect you from losing your valuable works, it is recommended to backup the server from time-to-time. This article will show you how to get it done by using the built-in backup script.
Perform backup to VP Server
Backup the server is pretty simple and can be done in few steps. To backup the server:
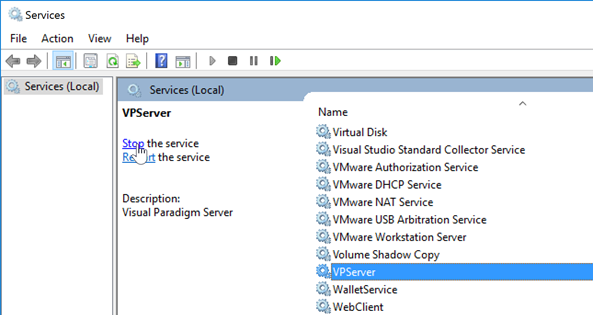
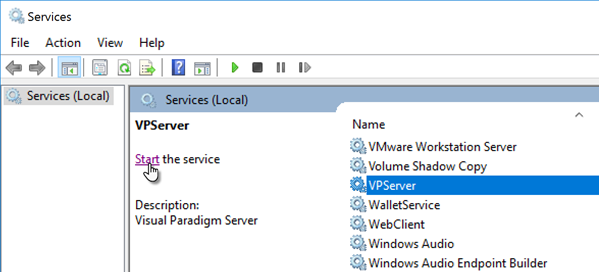
- Shutdown the running VP Server. If you have installed the server as system service, you can then stop the service of your running server. For Microsoft Windows you can go to Control Panel > Administrative Tool > Service, then locate the VP Server service to stop it. Note that you may need administrator permission on your Window in order to access to the Window system service.
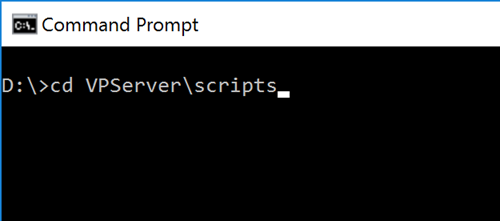
- Open Command Prompt (or Terminal for other platforms) and navigate to the scripts folder of the VP Server (using CD command).
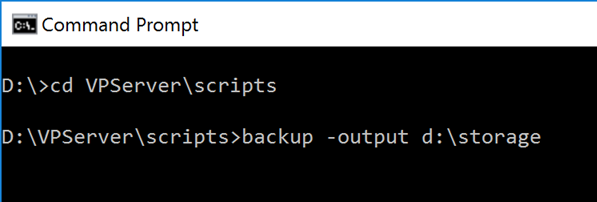
- Execute the backup script. You may optionally specify the -output parameter to specify the location for outputting the backup file.
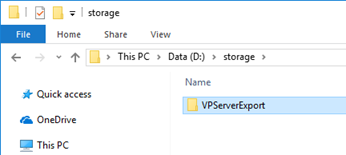
- Once the process completes the backup will be generated to location you specified. If no output location was specified then it will generated next to the backup script.
- Now you can restart the server and resume the service. If your server is installed as system service you can then launch it by locate the VP Server service under Control Panel > Administrative Tools > Service. Again, you may need to have administrator permission for access the Windows system service.
Restore VP Server from backup
You can restore the backup to a brand new VP Server in the following way:
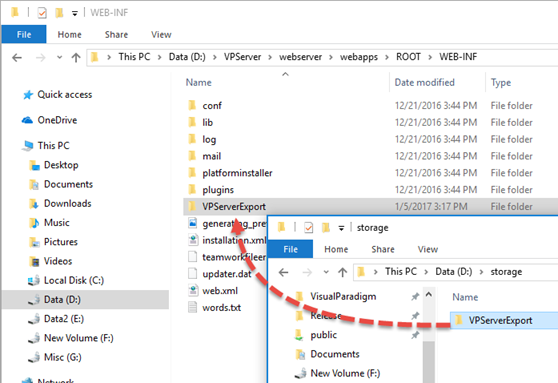
- Copy the VPServerExport folder to VPServer/webserver/webapps/ROOT/WEB-INF folder of the new VP Server.
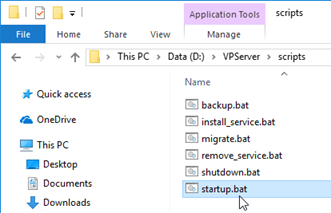
- Open the Command Prompt and execute the startup script inside the scripts folder of VP Server.
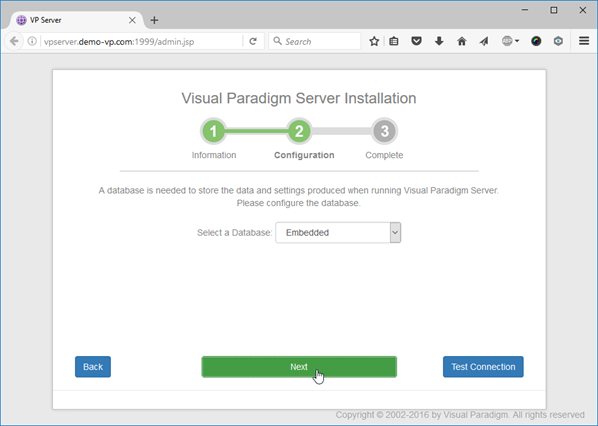
- Open the browser and connect to your server. You should be prompted the server found the backup package. Press Next button to proceed.
- You may take this chance to change the database of your server. Otherwise simply press Next button to go through the entire procedure.
- Once the setup is done you can then login to your server for a review, and you should see all the settings and data a preserved.
|
Related Know-how |
Related Links |




Leave a Reply
Want to join the discussion?Feel free to contribute!